Introduction

Young artists and writers, look beyond your gate and discover Australia’s varied landscapes.
These landscapes will give you great ideas to write, illustrate and publish a class multimedia picture book. Then organise a book launch and art exhibition to amaze your friends and family. You will:
-
produce artworks and each make a page for the book
-
make a collaborative artwork that could be the book’s cover
-
make decisions about the look of the book, including its cover
-
work collaboratively to organise a book launch and art exhibition
-
use apps to create artworks, augmented reality and/or a digital gallery
-
participate in Photo Voice, a tool to help you reflect on your learning.
Take a look at Why we love Australia created by K–4 students from Nowendoc Public School.
When you have finished working through this learning activity we would like your feedback so we can improve it. Please complete this short survey.


Working collaboratively to produce and launch a book you will take on many roles such as author, editor, artist, recording editor, technical expert, speaker and curator.
Before you begin, work with your teacher to:
-
organise a work group of four or five of your classmates
-
set up a group Art set on the Art Gallery of NSW website, to store landscape artworks you select from their collection
-
create a OneNote Class Notebook which includes:
-
a student Notebook for each student to be used as a portfolio of individual work to show learning. Only you and your teacher can access your student Notebook
-
a collaboration space where class groups and the whole class can work, edit and share
-
a content library where your teacher can place content for you to view.
-
-
set up a class slideshow in Microsoft PowerPoint Online or Google Slides, to bring together your artworks and create the picture book
-
choose a group member to be the first Photo Voice photographer.

Show your learning as you contribute to:
-
your portfolio, and the collaboration space in the OneNote Class Notebook
-
your individual writing and artwork
-
the class multimedia picture book
-
the book cover artwork and pitch
-
the planning and completion of the book
-
the launch of the class picture book
-
the class Photo Voice.
Find out about landscapes
In your group, view the image gallery below. Click the gallery title or any photograph to open the gallery.
Look at each photograph and discuss whether or not it is a landscape. Give your reasons for your decisions.


The Wynne Prize is awarded by the Art Gallery of NSW every year for ‘the best landscape painting of Australian scenery in oils or watercolours...’
Look at some landscape paintings that have won the Wynne Prize.
Add three winning artworks to your group’s Art set. Choose:
-
a very realistic landscape
-
a more abstract painting
-
a landscape artwork you really like.
View the landscapes your team members have chosen. Together, discuss the reasons for your choices.
Paste a link to your Art set into the class collaborative space so other groups can view the landscapes you added. Look at the Art sets of other groups.

© Henry, Nowendoc Public School
What is a landscape artwork?
As a group, define ‘landscape artwork’:
-
Write your own definition then share it with another group member.
-
Shape the two definitions into one.
-
As a group consider the definitions and write a group definition in the collaboration space
-
Check this against an expert’s opinion and modify your group definition if needed.
Take a series of photographs of a landscape near you. Choose your favourite photograph.
Use an app such as Waterlogue, Glaze or Prisma and manipulate your photograph to make it look like a painting. Work to capture the mood or emotion you want to include in your landscape work.
Upload your original photograph and your manipulated work to the collaboration space for others to see. Don’t forget to add your name near your works.
Does your original photograph or your manipulated work tell the viewer more about the landscape? How?
Is your manipulated photograph a landscape artwork? Explain why or why not?
Think about the mood, emotion and senses evoked. Write a couple of sentences in your portfolio to tell about this.
Talk with your group about how their landscape artworks fit with the group definition.
Explore picture books

Look at some landscape picture books that feature Australian landscape artworks.
Explore the layout of the text in the books.
Discuss:
-
the age group the books best suit
-
techniques the writer has used to make the book appealing to the age group
-
why the layout is important and how it helps young readers.


Choose one picture book that you particularly like. Make a list of words that are:
-
related to any of the five senses (taste, touch, hearing, smell or sight).
Search for examples of figurative language.
Share your examples in the class collaboration space.

© Nick, Nowendoc Public School
Look for artworks in your picture books, where the artist uses:
Make notes in your portfolio about:
-
the method the artist has used
-
what the method contributes to the artwork
-
why the artist might have used this method.
Use your notes to help you talk to your group about the method. Add your notes and any relevant images to the collaboration space.
Artists can suggest the senses, mood and emotion in their artworks through the use of elements such as colour, texture, and light and shade.
Search one or more landscape picture books for examples where illustrations suggest any of the five senses (taste, touch, hearing, smell or sight). In your group discuss:
-
Which of the five senses are suggested in the book?
-
How has the artist suggested the sense/s?
Choose an artwork and talk with your group about how the artworks had an effect on your senses and how the artist achieved this.
Look through one or more landscape picture books for examples of illustrations that evoke an emotional response or mood.
-
What mood or emotion is expressed in the image?
-
How has the artist created this mood or emotion?
-
What adjectives (descriptive words) would you use to describe this image?
Choose an artwork and talk with your group about the mood and emotion and how the artist has achieved this.
Choose a landscape you have visited and use it as a subject for a painting.
If your artwork will have an horizon, where will it be positioned?
View the image gallery below. Look at the position of the horizon in each photograph. What do you notice?


If your landscape will include a vanishing point, how will you show it?
View the image gallery below. Find the vanishing point in each photograph.


Consider what you want your artwork to tell the viewer about the landscape then make your landscape artwork.
Next add text to your work.
Upload your work to the collaboration space. Choose another group member’s work and write something you:
-
like about the work
-
think might improve it.
What does your artwork tell the audience about the landscape? How did you achieve this?
How does your writing help the audience understand the landscape?
How could the comments written about your artwork help when you make another one?
How could you improve your work?
Focus on backyards
Many Australian artists have used their backyards or nearby environments as the subject for their artworks. In your group choose one of the following artists and use the study guide to discuss the artwork.
The Balcony 2 1992 is an oil painting by Australian artist Brett Whiteley. It is one of a series of paintings that show the interior of, and the view from, Whiteley’s home in Lavender Bay on Sydney Harbour. He used a colour in this painting, and a series of paintings, that he said made him feel ecstatic. Which colour do you think that was?
How many colours can you see in this artwork?
Entrance to the Seaport of Desire 1964 is a watercolour artwork made by Australian artist John Olsen. He has painted an aerial view of Sydney Harbour with watery lines, shapes and symbols. He wants to tell the viewer about the excitement of returning to the harbour after travelling in other countries. It has been said that Olsen’s map-like artworks are landscape artworks without horizons. Olsen uses an arrow to draw the viewer into the painting.
Make a list of objects you think Olsen has represented in his artwork.
Songs of a Summer Night (Lynne’s Garden) 1985 is a mixed median artwork by Colin Lanceley. He liked to make artworks about things he considered beautiful. This artwork is about his friend Lynne Clarke’s garden where he often enjoyed an evening meal. Clarke’s father was Australian painter Russell Drysdale. Lanceley’s garden paintings often had black backgrounds representing the night and included many other colours and 3D objects. Lanceley said ‘I love using the colour black. I love using it against other colours, because it makes them sing.’
Search for the 3D objects in Lanceley’s work.
Kuringai 1977 is an oil painting by Australian abstract artist John Coburn. Coburn said ‘I want to express my feelings about nature and the world’. Coburn used simple shapes and bright colour to achieve this.
What do you think are Coburn’s feelings about Kuringai, where there is a national park?
Show the artwork and your group’s thoughts and mood words to the class.

Focus on shape and colour as you make an artwork about your backyard or the school playground.
Follow the steps in Backyard shapes (.pptx 4MB) to make your backyard artwork.

An artist statement is a short, written statement that tells the viewer about the artwork. The statement gives facts about the artwork.
Write an artist’s statement about your artwork. Include information such as:
-
your name, the name of the artwork and the year it was created
-
what your artwork is about
-
the materials you used
-
how you made the artwork
-
what is different or special about your artwork
-
the artist/s who inspired your work.
Photograph your work and place it and your statement in the collaboration space.
You have seen the artworks of four Australian artists. Consider:
-
What did you like and/or dislike about the artworks?
-
Was there one artwork that you preferred? If so which one and why?
-
Which artwork told you the most about the artist’s backyard or environment? How did the artist do this?
-
What emotions do the artworks evoke and how has the artist achieved this?
Now that you have finished your artwork consider:
-
What did you want to tell the audience with your artwork?
-
How did you try to do this?
-
What was successful about your work?
Create a class picture book

Plan a class picture book featuring landscape artworks and accompanying text. Each class member will make an artwork for the book. Also decide on other book sections to include.
As a class, discuss and record your decisions in the collaboration space:
-
the age of the audience for the book
-
the font that will be used
-
the layout of the pages
-
what will be included
-
what will be accepted as a landscape artwork for the book—look back at the group definitions
-
the landscapes that will feature: choose a landscape.


Find an image of the landscape you will be working on and print a copy if necessary. Use this image as an inspiration for your artwork.
Make an artwork about the landscape you were allocated for your page in the picture book. You could use:
-
oil pastel
-
water colour paint
-
acrylic paint
-
a combination of the above.
Before you begin, think about all you have learnt about landscape artworks and how you want your artwork to look.

Look at your landscape artwork. Imagine you are in that landscape right now. Consider:
-
what you can see
-
what you can hear
-
what you can smell
-
the textures you feel around you
-
the emotions you feel.
The text you write will appear with your artwork in the class picture book.
Refer to your artwork, other images, language features and write to evoke a sensual and emotional response.
Look at the collaboration space to see what book sections the class chose to include, for example, a preface or acknowledgement page.
Decide which class members will write these sections. The cover will be made at a later stage.
The assigned class members should now write the relevant book section.
Carefully check your work:
-
read your writing carefully. Can it be improved?
-
ask another student to edit your work and suggest improvements
-
look at the collaboration space to ensure your work addresses the relevant decisions made in ‘Plan the book’.

© Asher, Nowendoc Public School
Upload a digital copy of your finished artwork to a new page (slide) in the class picture book. Add the text you wrote to accompany your art work and format it suitably.
If you helped to write the content of a book section, add this now to the class picture book. Each book section should be on a new page (slide).
With your classmates, look at all the pages in the book. Decide on the order of the pages of the book and re-order the slides accordingly. You might want to make some changes to the order later on.
Think about a title for the book.
Think about your page for the class book:
-
What are the strong points of your page?
-
What improvements could you make to your page?
-
How does your page follow the decisions made during the planning stage?
-
How have you contributed and made sure you are a responsible collaborator?
Make a book cover

Your group will work together to create an artwork that could be featured on the cover. First, let’s explore how others have collaborated on projects.
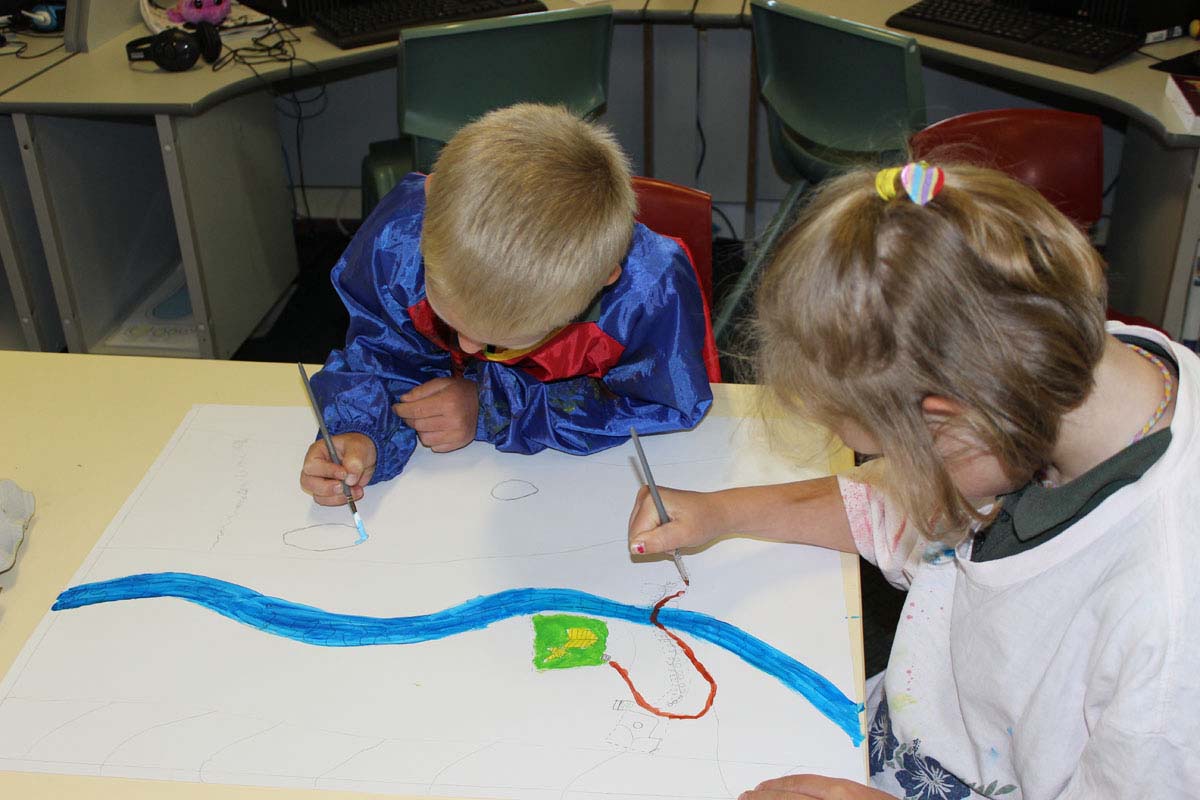
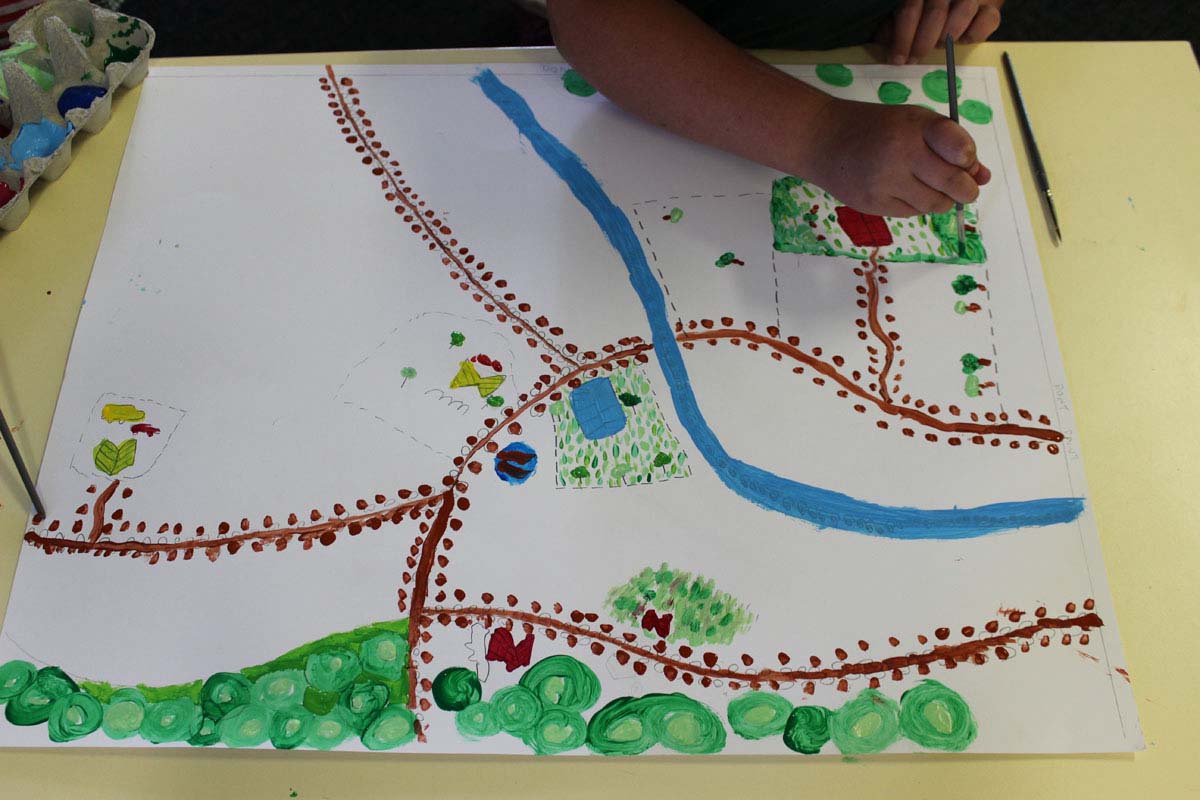
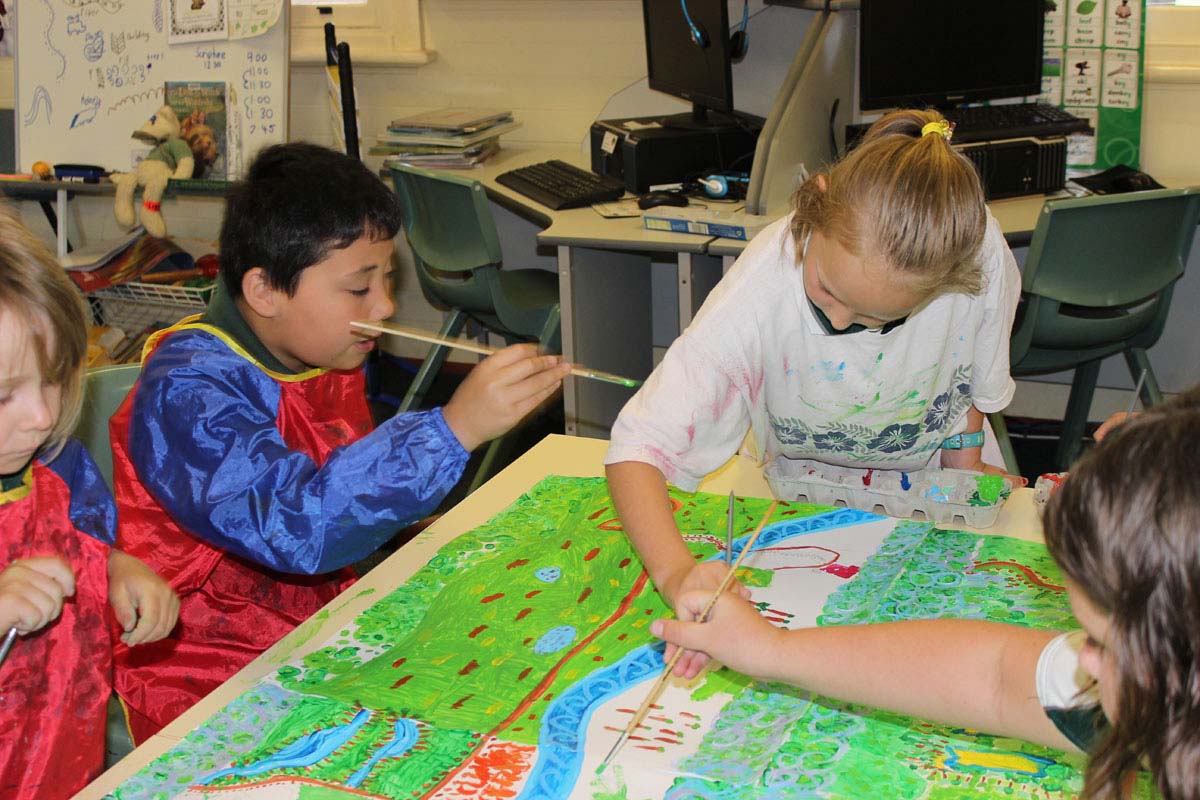
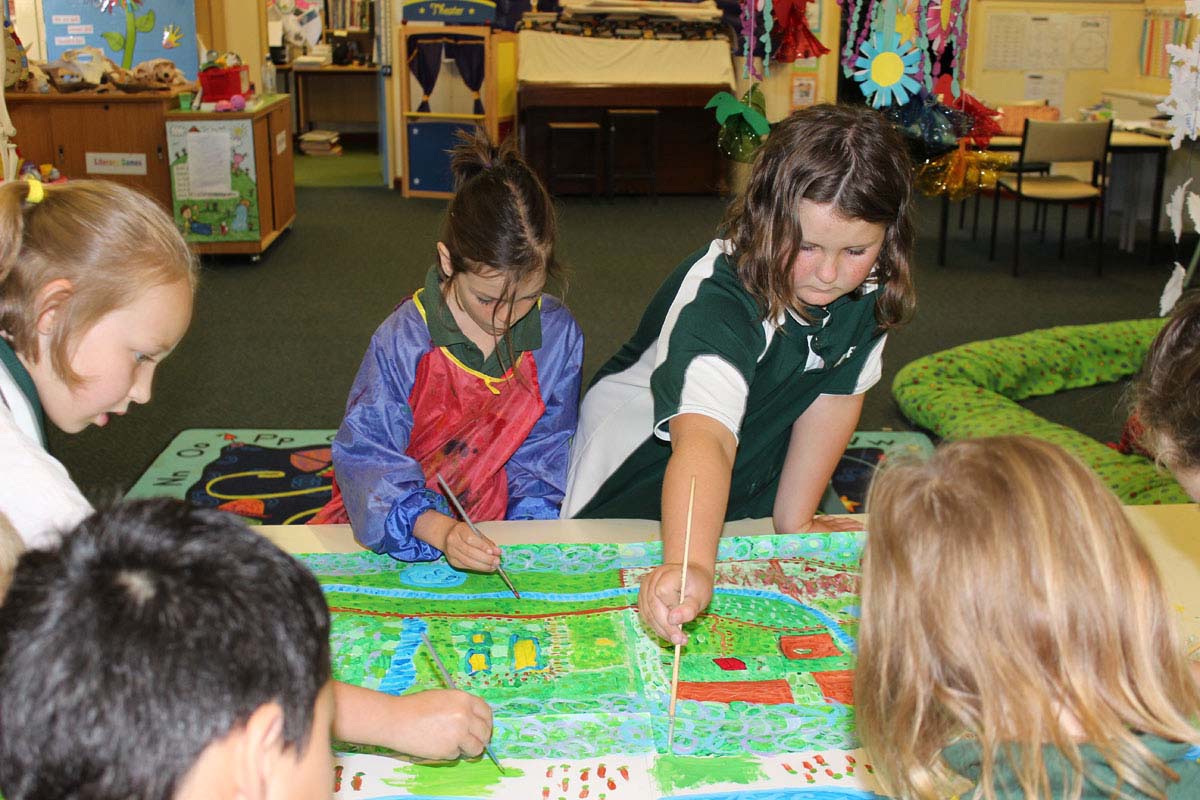
View the image gallery below to see the steps a class took to make a collaborative artwork. Discuss each slide and how the group is working.
Ngalangka Nola Taylor, a Martu artist from the Far Western Desert, says that ‘People don’t like painting alone’. What do you think?
In your group, select one of the collaborative artworks listed below by Martu artists. The page that opens includes a link to an image of the artwork and a guide to help you explore it.


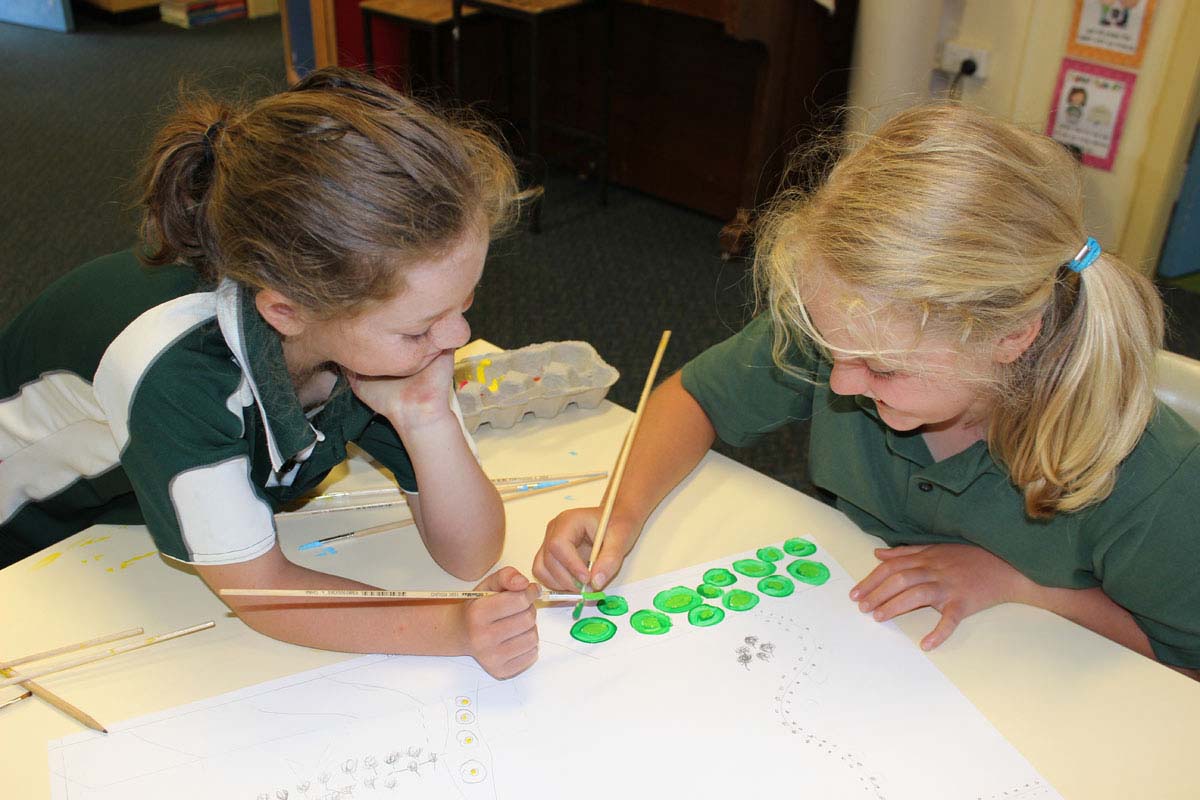
In your group make a large collaborative painting or mixed media artwork that could be selected for the cover of the class book.
When you work collaboratively it’s important that every group member contributes fairly to the work. In your group discuss the skills group members will need to work well collaboratively.
There are many ways you could collaborate to make your artwork. Here are a few to get you started:
-
some group members draw, others complete the painting and others add the details
-
divide the painting into sections, one area for each group member
-
all work together on each step of the work
-
some group members start the work and others build on it as they have time.
Decide how your group will work to produce its artwork. Consider who will be responsible for different roles. Document this in the collaboration space. You might change the process as you make your artwork and different needs arise.
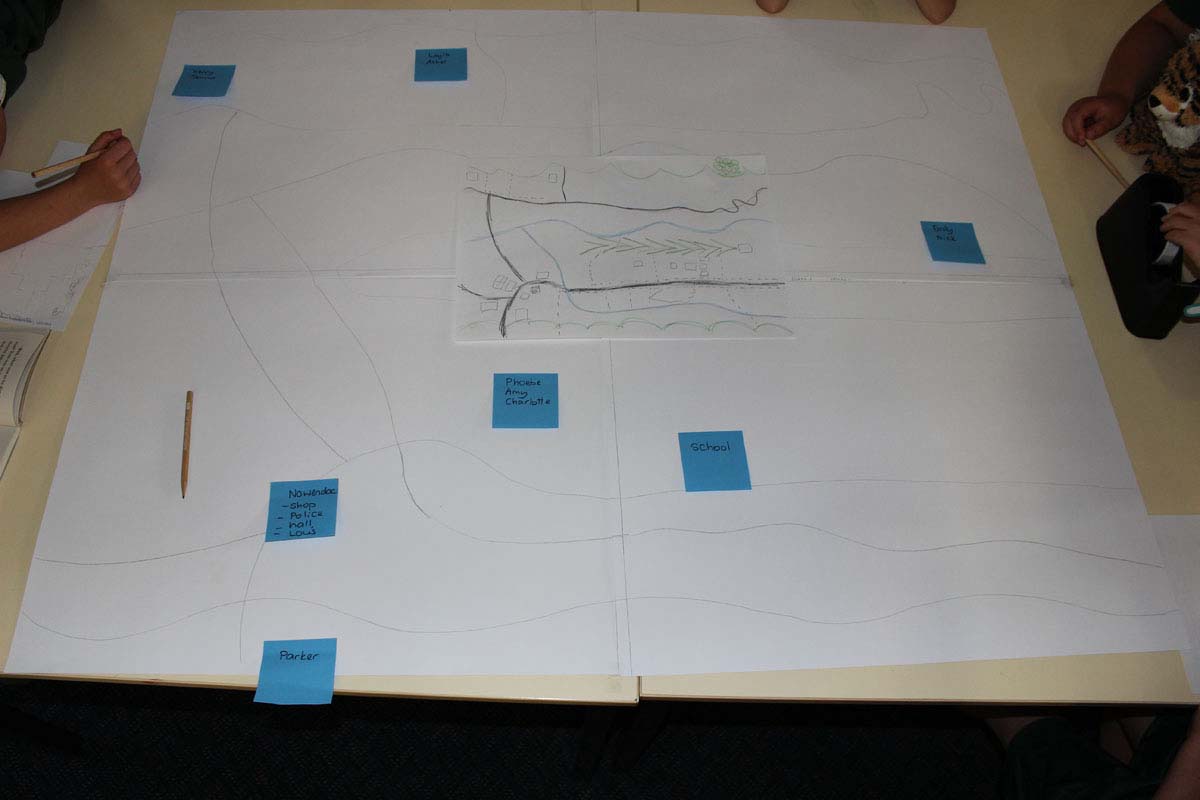
Choose an area that your group is familiar with as the subject for your collaborative landscape artwork. You could view the area by looking:
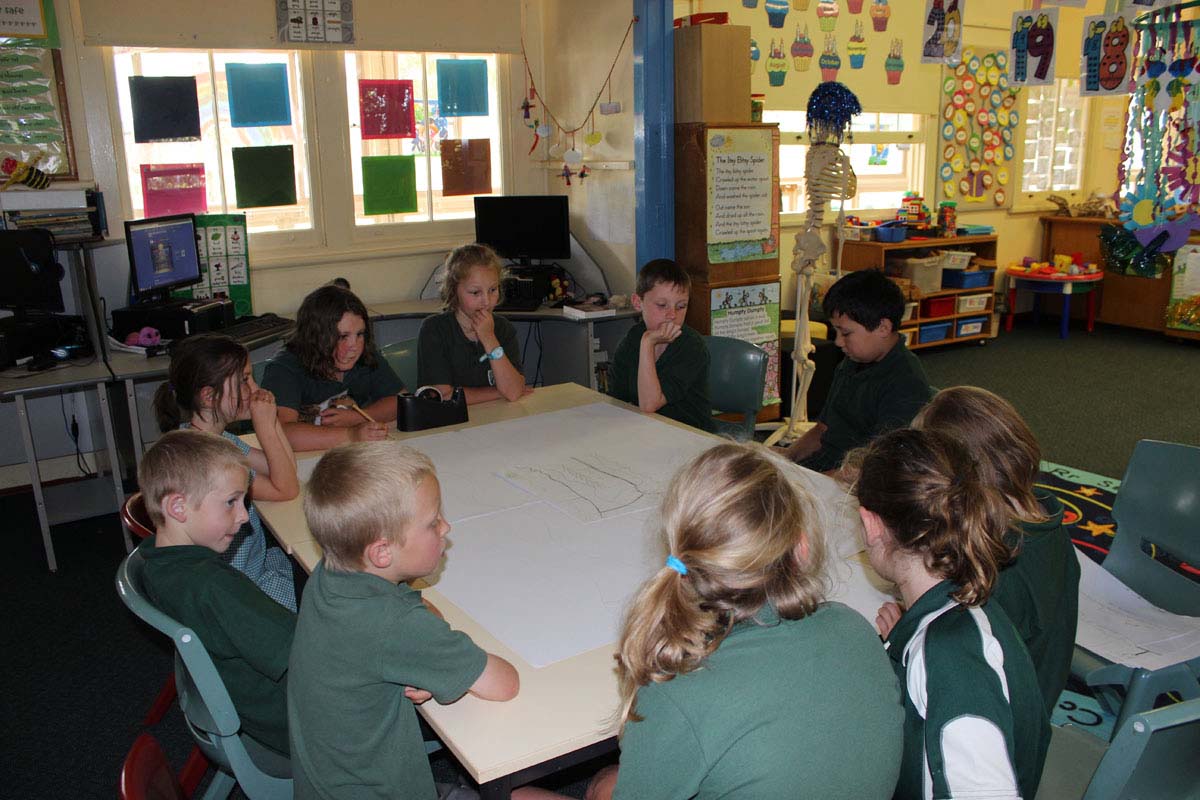
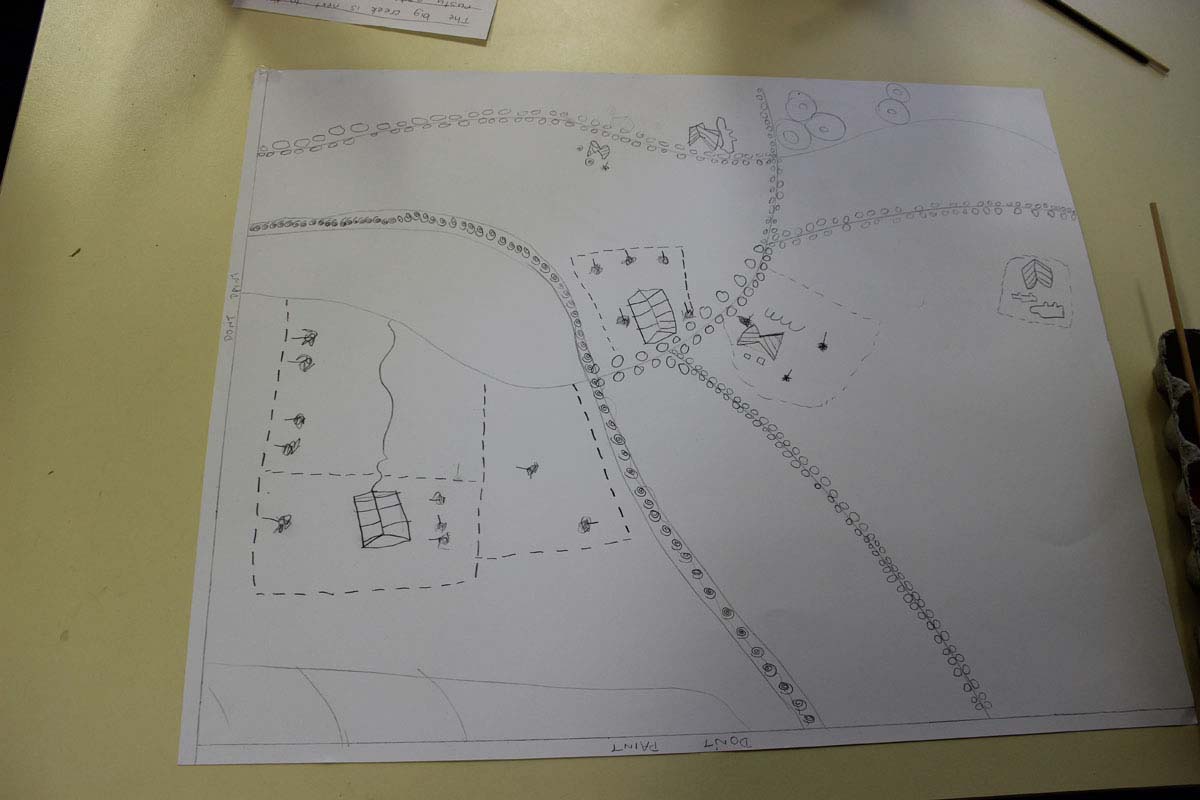
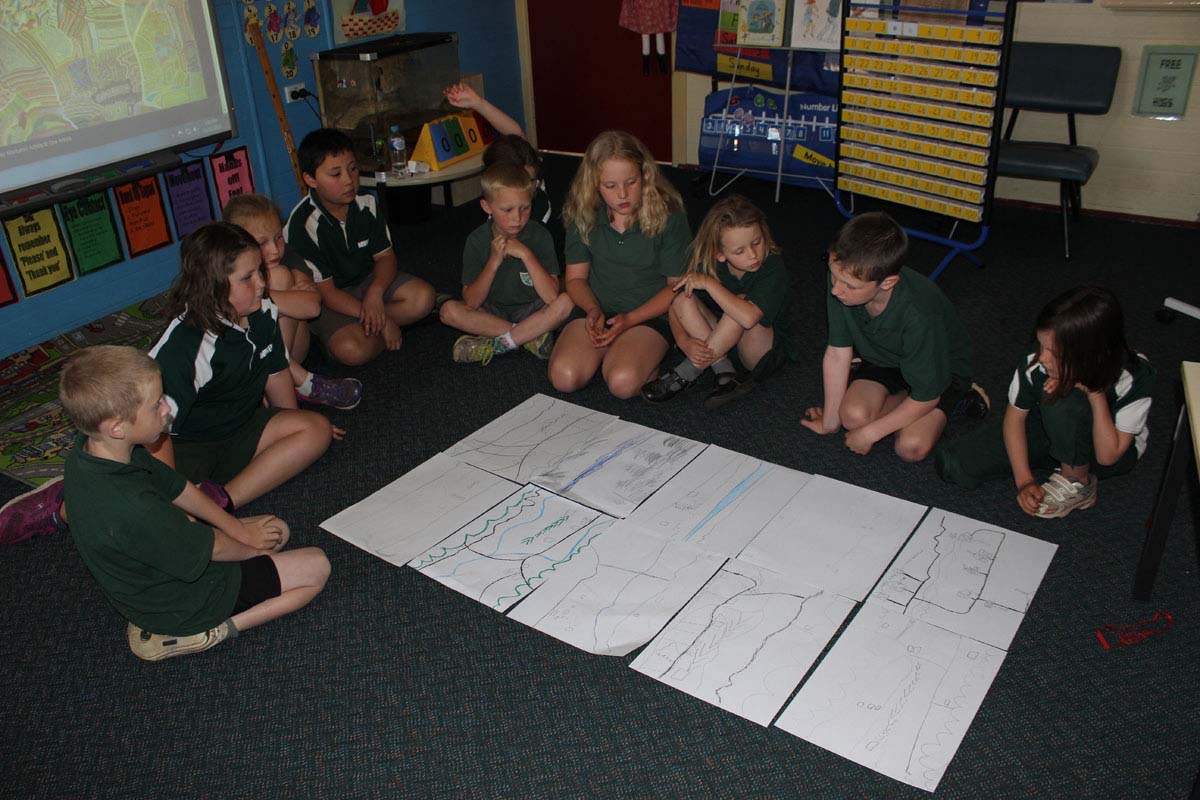
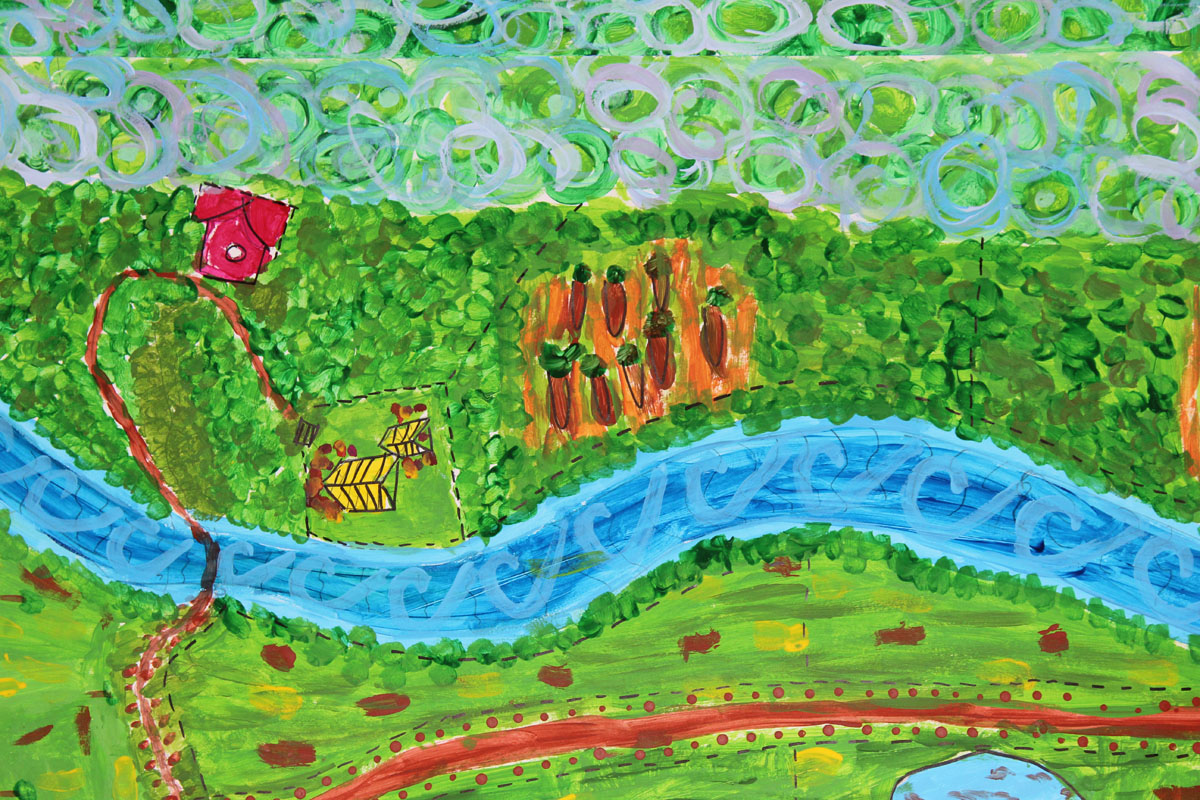
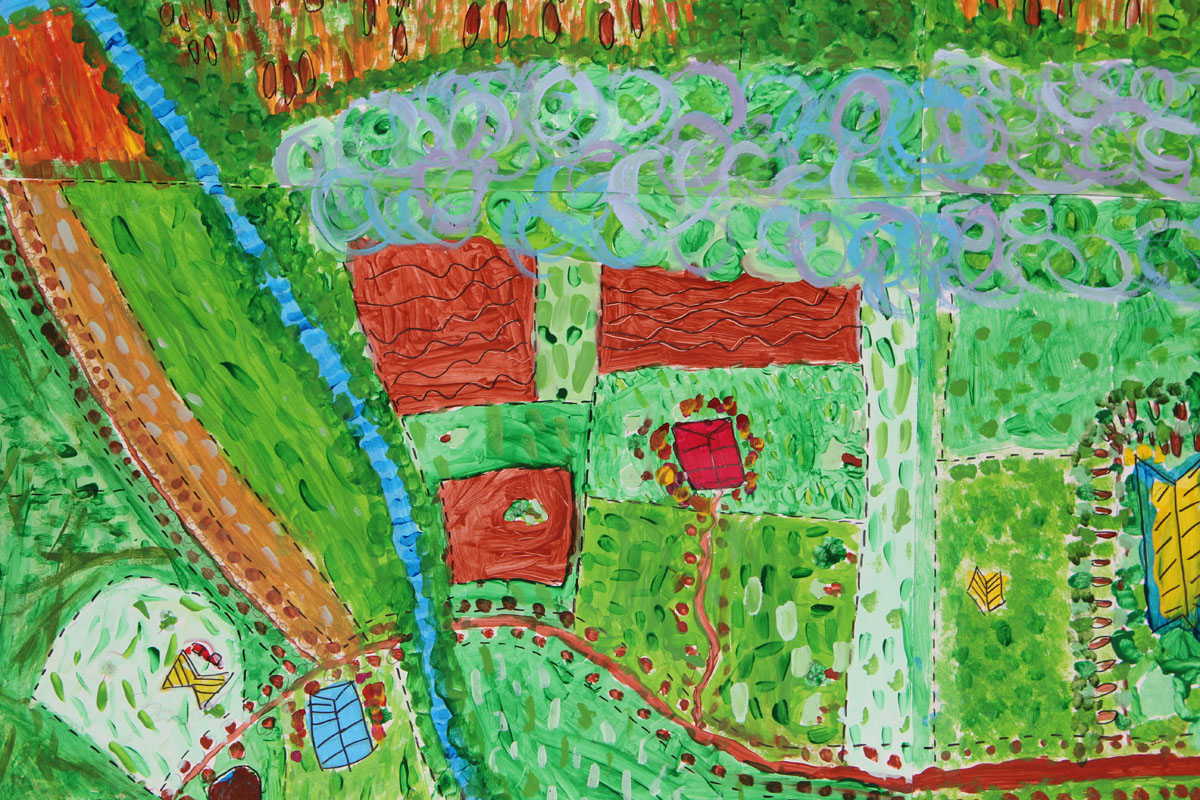
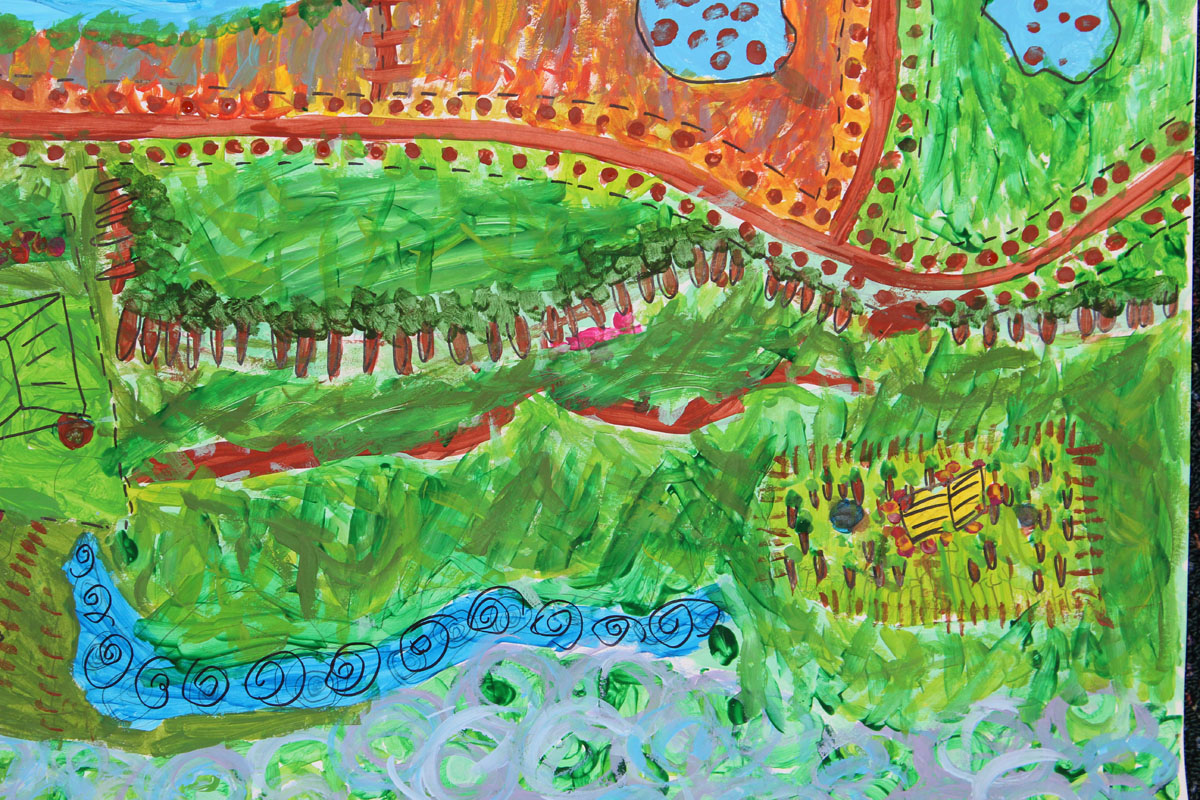
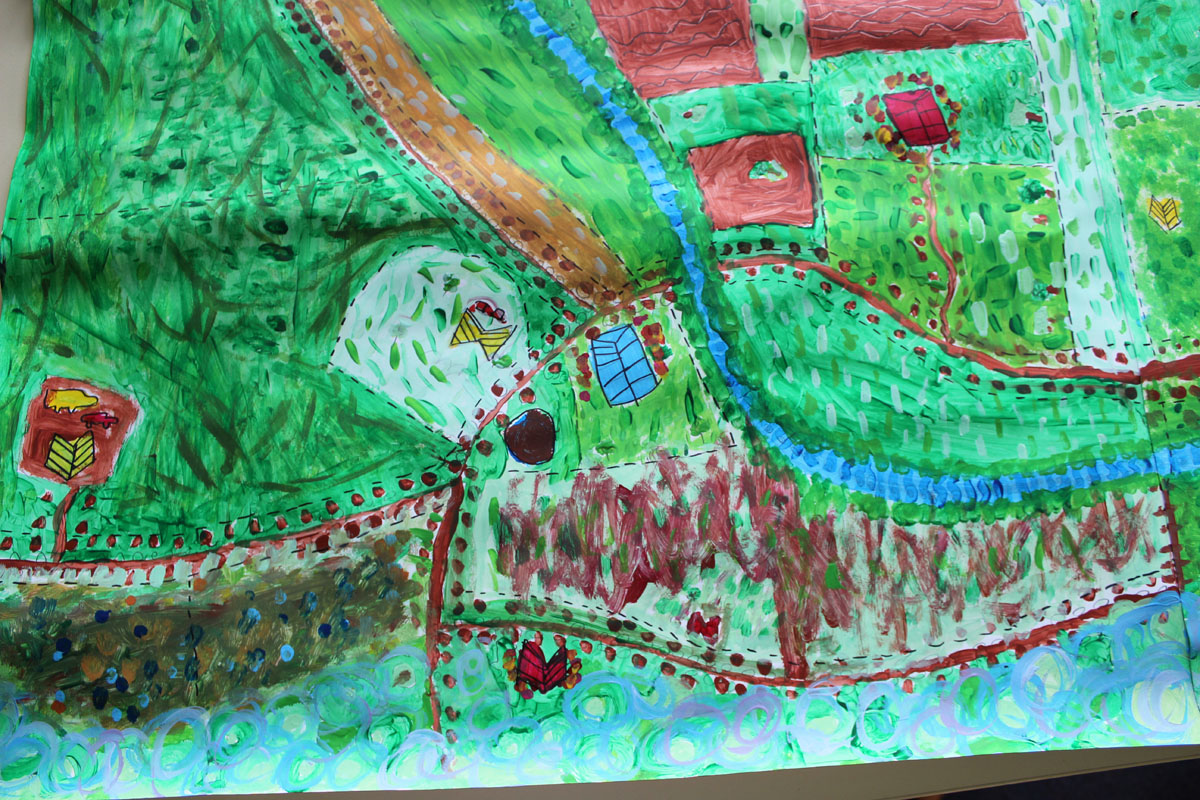
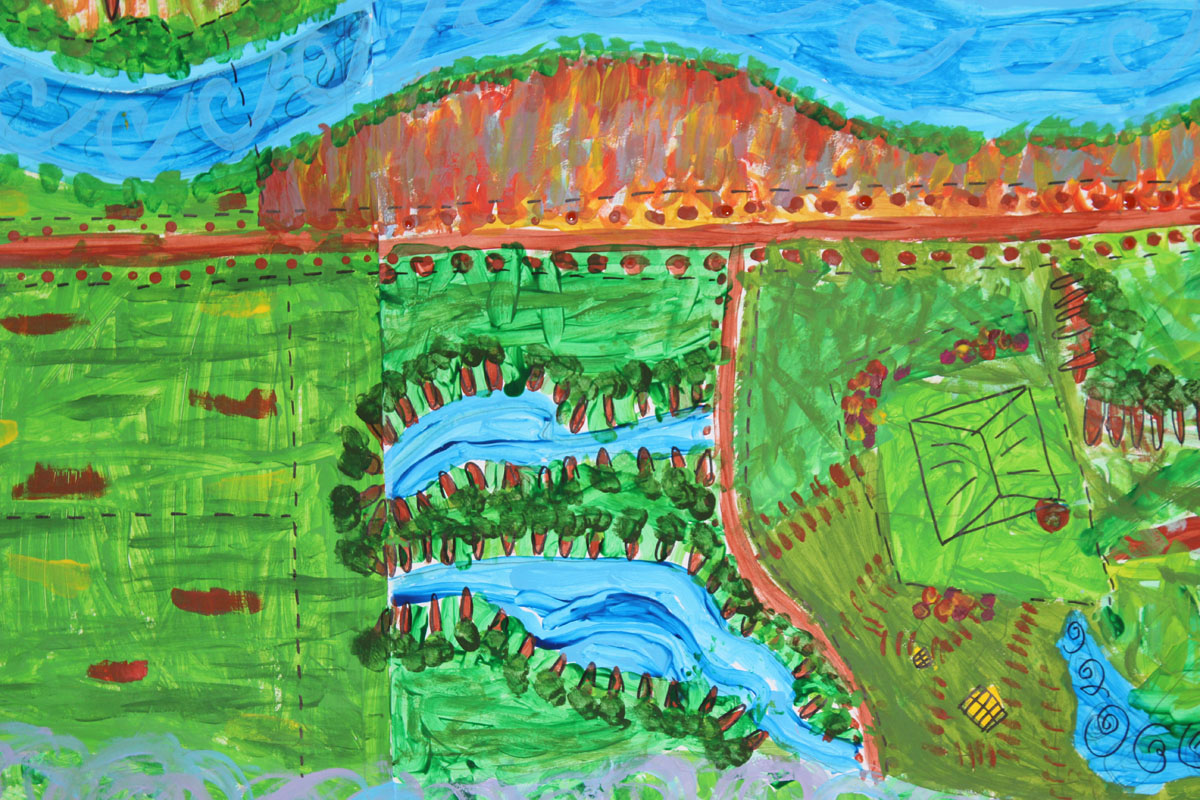
Students from Nowendoc Public School used Google Earth to look down on their chosen geographic area. The image gallery below shows details from their large collaborative artwork.
As a group decide:
-
what media will be used
-
how you will get started
-
what colours, symbols, patterns and techniques might feature in the work.
Record your decisions in the collaboration space.
It is usually easiest to start with the back layer of paint, work up to the top layer then add the details. Be prepared to change your plans and add new ideas as you progress.
When your group has finished its artwork submit it to the collaboration space for consideration as a cover artwork.
As a group, make notes about why your group’s artwork should be selected for the book cover. Choose one person from your group to persuade the class to choose your group’s artwork.
Each class member will decide which artwork they think would be most appealing to the audience of the book.
Vote for the artwork of your choice.
The painting with the most votes will be on the cover. Discuss how the other artworks might be used in the book or in other ways.
View the class book so far. As a class choose a title for the class book. Make decisions about the cover:
-
What text will be on the cover?
-
What style and/or font will be used for the text?
-
Where will the text be placed?
-
How will the text be added?
Decide on a group of students to complete the cover. This group will need to:
-
write the text
-
add the text to the chosen cover image
-
add other finishing touches
-
add the cover to the class PowerPoint presentation.
What were the advantages and disadvantages of working collaboratively on your artwork?
If there were disadvantages, how could you change these to be more positive?
How successful was the way your team chose to work?
What would you do differently next time you work collaboratively on a task? Why?
Now that you have worked collaboratively on an artwork, what do you think about Ngalangka Nola Taylor’s comment that ‘People do not like painting alone’?
Publish and launch the book
Your book cover and all of the pages written and illustrated by class members should now be in the class PowerPoint Online or Google Slides. To complete and publish your book you will need to:
-
proofread all slides and correct any errors
-
finalise the order of the pages in the book, making changes if needed
-
complete other tasks that you identify
-
share the book so your audience can view it.


In your group discuss how to launch the class book. Consider:
-
the type of event
-
when and where the launch will occur
-
who will be invited to the launch and how this will be done
-
who will officially launch the book
-
how you will promote the event
-
the running order of the launch
-
audience reviews of the class book
-
what will happen during the event.
Share your group’s ideas with the class and make decisions. Make notes about the decisions in the collaborative space.
In the collaborative space, record who will be responsible for each of the tasks and a finishing date for each. Remember for the launch to be a success it needs to be a class effort. Everyone will need to take responsibility and work cooperatively with each other.
Remember to list and allocate jobs that need to be done on the day of and during the launch.
As you proceed with the arrangements add other tasks that you think of.
Leading up to the launch you will need to have meetings to assess progress, check the timeline and make adjustments so that everyone contributes fairly and all the necessary jobs are finished in time.
There will be many things to do on the day of the launch. Be sure that class members are ready for these tasks.
-
set up the space
-
plan the spaces and hang artworks
-
set up and test the technology
-
have a run through of the presentation.
-
welcome guests as they arrive
-
operate the technology
-
assist guests with technology if needed
-
make sure guests leave a review of the book
-
thank the audience for attending.
After the launch think about:
-
whether your plans worked and if not what you did about it
-
whether all class members worked fairly and responsibly and, if not, how this could be improved next time
-
how you felt at the time of the event
-
what you liked about the process of organising and holding a book launch
-
what you might change next time
-
what you learnt
-
what you learnt from the audience reviews
-
how the Photo Voice assessment helped you to improve your learning.
Information for teachers
The resource supports students across Stage 2 English and creative arts (visual arts). It was initially trialled with Years K–4 and could be easily adapted for Years 5–7.
Watch Through the Gate with Collaborative Online Learning to see Nowendoc Public School students and teachers in action with Through the Gate.
While the resource is written for Stage 2 students they will require support to ensure:
-
students can read and understand the activities
-
in-depth and skilled discussion
-
students work to their potential
-
all students contribute responsibly and fairly to group work
-
safe access to technology.
Teachers will need to assist students with the structure of their portfolios and the collaborative space in the OneNote Class Notebook, ensuring organisation for easy access to group work and other documentation.
English Outcomes, Stage 2
Through responding to and composing a wide range of texts and through the close study of texts, students will develop knowledge, understanding and skills in order to communicate through speaking, listening, reading, writing, viewing and representing
Outcomes
A student:
-
communicates in a range of informal and formal contexts by adopting a range of roles in group, classroom, school and community contexts(EN2-1A)
-
plans, composes and reviews a range of texts that are more demanding in terms of topic, audience and language (EN2-2A)
-
uses effective handwriting and publishes texts using digital technologies(EN2-3A)
Through responding to and composing a wide range of texts and through the close study of texts, students will develop knowledge, understanding and skills in order to use language to shape and make meaning according to purpose, audience and context
Outcomes
A student:
-
identifies and uses language forms and features in their own writing appropriate to a range of purposes, audiences and contexts (EN2-7B)
-
identifies and compares different kinds of texts when reading and viewing and shows an understanding of purpose, audience and subject matter (EN2-8B)
Through responding to and composing a wide range of texts and through the close study of texts, students will develop knowledge, understanding and skills in order to think in ways that are imaginative, creative, interpretive and critical
A student:
-
thinks imaginatively, creatively and interpretively about information, ideas and texts when responding to and composing texts (EN2-10C)
Through responding to and composing a wide range of texts and through the close study of texts, students will develop knowledge, understanding and skills in order to learn and reflect on their learning through their study of English
A student:
-
recognises and uses an increasing range of strategies to reflect on their own and others’ learning (EN2-12E)
Visual arts, Stage 2
VAS2.1 Represents the qualities of experiences and things that are interesting or beautiful by choosing among aspects of subject matter.
-
focuses on details of subject matter and areas of beauty, interest, awe, wonder and delight
-
seeks to investigate traditions in art suited to different subject matter (for example, the landscape, the figure, the narrative, formal and abstract properties, the use of symbols) and uses these in their artmaking
VAS2.2 Uses the forms to suggest the qualities of subject matter.
-
emphasises or exaggerates certain qualities of selected subject matter by focusing on details, using distortion and elongation, changing viewpoint or enlarging or reducing the scale
VAS2.3 Acknowledges that artists make artworks for different reasons and that various interpretations are possible.
-
recognises that people have different views about artworks and their meanings that are informed by their understanding of such things as the circumstances of the work, the artist’s intentions and skill, and what the work is about
VAS2.4 Identifies connections between subject matter in artworks and what they refer to, and appreciates the use of particular techniques.
-
identifies resemblances between subject matter in artworks and the features of things as they exist in the world, recognising similarities and differences in how things are represented in the artworks
-
talks and writes about the meaning of artworks in terms of how subject matter realistically represents things in the world
Through the gate provides explicit pathways for learning across the curriculum content for the following:
Cross curriculum priorities:
-
Aboriginal and Torres Strait Islander histories and cultures
-
sustainability
General capabilities:
Students should be aware when visiting websites to view artworks by Aboriginal and Torres Strait Islander peoples that these sites may contain images and voices of people who are since deceased.
Ensure that students practise good digital citizenship by providing correct attribution and copyright information for images.
Useful links:
Digital Citizenship for schools
Consider how and when you and your students will give feedback, and formative and summative assessment, at different points throughout the project.
Online collaboration tools can provide a range of feedback and assessment methods.
Consider using:
-
the comment tool in Google Docs or Word Online to give specific feedback at a particular point
-
the simultaneous audio and written commenting functionality in OneNote Class Notebook
-
other programs – for example Jing or Screencast.com – to give feedback via screencasts and audio.
See Technology rubrics for any classroom for marking guidelines for digital work.
Some YouTube videos are suggested to support learning. A teacher login is required to view these. They are not accessible via a student portal login.
View the videos before showing them to students to ensure their suitability.
Students:
-
work independently to search the Art Gallery of NSW collection for examples of landscape artworks. Each group member contributes these to a group Art Set. The group discusses the decisions that underpin the collaborative collection
-
work as a class to make decisions about their class book. For example, what type of images will be accepted, the format and structure of the book
-
share responsibility as they create a page for the class book and plan and conduct a book launch.
Students:
-
examine different types of landscape artworks, develop a definition for ‘landscape artwork’ then apply their knowledge to their own art making
-
explore picture book artwork, text, language features and layout, then apply their learning to design and create their own class picture book
-
work in groups to study a variety of artworks and techniques, then share their findings with the class to create a body of knowledge
-
engage in interdisciplinary learning activities through writing, art making, and the study of Australian Aboriginal artworks.
Students:
-
take on roles such as author, book illustrator, publisher and curator to meet the challenge of creating a collaborative book and organising an event to launch it
-
consider suggestions for a book launch then plan and carry out the event. They make a running sheet and present the event for a real audience.
Students:
-
connect with the Art Gallery of NSW, searching its collection and curating group Art Sets about landscape artworks
-
contribute to an individual portfolio and a collaborative space using Microsoft Office 365, OneNote Class Notebook
-
use apps to manipulate a photograph
-
use presentation software such as Google Sides or PowerPoint
-
might use an augmented reality app such as Aurasma as part of their book launch. They might also choose to create a virtual art gallery using software such as Emaze.
Students:
-
work for an extended period of time through the process of producing a book and planning and hosting a book launch
-
plan their class book launch, making decisions, scheduling tasks and timelines as well as assigning tasks to class members
-
collect reviews of their class book
-
reflect on the launch event, its successes, issues and ways to improve such an event next time.
Students:
-
define landscape artworks providing varied examples
-
interpret artworks and create meaning through artworks
-
contribute to a collaborative artwork and explain why their group artwork should be chosen for the cover of the class book
-
write and illustrate a page for a collaborative book using textual features
-
create and publish a multimodal digital storybook for a particular audience.
‘Through the gate’ presents students with a real-world challenge to create a class picture book and organise a launch event for the book.
The first section introduces students to their landscape picture book task and the steps involved. They view Why we love Australia, created by Nowendoc Public School K–4 students after studying picture books, in particular Why I Love Australia, by Bronwyn Bancroft, and In my Backyard, by Nette Hilton and Anne Spudvilas.
After gaining an overview of their task, students get organised for the work and learn how they will be assessed.
Overview
To address the challenge, students will:
-
work across English and visual arts subject areas
-
use collaborative technology to share their individual and group work
-
access The Art Gallery of NSW Art Sets to study, define and build their knowledge (see further note in ‘Get organised’ below)
-
apply their knowledge to create landscape artworks
-
study picture books to build knowledge then construct a class picture book for a specific audience through planning, collaborating, decision making, problem solving and creating
-
use ICT to create an authentic product, a class digital book, for a specific audience
-
present their book at a launch
-
find innovative ways to complete a reading for a defined audience
-
develop skills to work collaboratively.
Get organised
Before students begin their work:
-
set up a OneNote Class Notebook (Office 365 suite accessed via the NSW Department of Education portal), including:
-
collaboration space where you and the class can work together, contributing, reading, viewing, reviewing, and commenting on work
-
a private Notebook for each student to build their portfolio of work, accessed only by the student and you, the teacher
-
a content library to place content for the class to view.
-
-
organise students into groups of about five student
-
establish an Art Set for each group on the Art Gallery of NSW (AGNSW) website. Art Sets allow students to create and save their own gallery of artworks in the AGNSW collection. They can also upload their own artworks to the set.
-
create a new file in PowerPoint Online (Microsoft Office 365) or Google Slides for the class presentation/multimedia book
-
have students select one member of their group to be the first photographer for Photo Voice (.pdf 153kb) (see more on Photo Voice in ‘Assessment’ below).
Note: Consider student safety and privacy of data when setting up Art Sets for each group.
Assessment
Students will have the opportunity to reflect on their own work and assess and give feedback on their group’s work, and the class’s work.
Photo Voice (.pdf 152kB) will enable students to develop their understanding and assessment of their learning process. Teachers and students can use this tool to evaluate the learning process.
Ongoing teacher assessment and feedback will allow for specific teaching and guidance to support student progress. Assessment and feedback should cover a student’s:
-
work processes and end result
-
responsible and fair contribution to group and collaborative tasks
-
planning, research, decision making, and problem solving
-
ability to work both individually and as a group member, contributing to group success
-
organisation and content of their portfolios.
Both teacher and peer feedback will enable students to build on their learning and make changes, where needed, to improve.
Implement Photo Voice when you begin ‘Through the gate’ with your class and continue throughout the task.
This section of the resource encourages students to work together to construct their knowledge of landscapes and landscape artworks.
Landscape or not?
In order to generate ideas and understanding about landscapes students look at a series of images and discuss whether each is a landscape and, if so, why. Students decide whether things such as oceans, sky, buildings, people and animals fit within the definition of ‘landscape’.
Wynne Prize
For this section, students will need to access to their group’s Art Set on the NSWAG website.
Note: If you haven’t already created the Art Sets for each group you will need to do so now. Consider student safety and privacy of data when setting up them up.
Students develop their understanding of landscape art by:
-
studying landscape artworks entered in the Wynne Prize, a real-world art competition
-
selecting three previous Wynne Prize winners and adding the artworks to their Art set
-
discussing the group’s Art Set and why the particular artworks were selected. Students can also look at the choices of other groups and give feedback. Students could create an Art tour of landscape artworks if planning an excursion to the AGNSW.
Students could also search Google cultural institute for landscapes or Australian landscapes.
Landscape artworks
Students independently write a definition for ‘landscape artwork’. They build on this knowledge as they:
-
work interdependently to develop a group definition of ‘landscape artwork’
-
test their definition against that of an expert in the field. To do this, students could access an online art dictionary, communicate with a landscape artist or communicate with art gallery personnel. Students refine their group definition as appropriate.
Ensure students have experienced a variety of landscape artworks and understand that a landscape artwork might be a photograph (although a snapshot is not necessarily an artwork), painting, drawing, digital artwork or mixed media.
Frame a landscape
Students apply their knowledge by creating landscape artworks themselves. They take photographs of a nearby landscape and choose their favourite to manipulate in an app such as Waterlogue, Glaze or Prisma to make it look like a painting, considering the mood or emotion they want create. Students discuss their artworks in terms of the definition they have built. Encourage students to discuss the:
-
difference between their original and manipulated photographs
-
moods, emotions and sensual inclusion that artists can develop through their artistic decisions
-
artist’s intention as they create
Reflect
Ensure students reflect on the questions under the last tab. This could be through individual reflection, including writing in a journal, and group or class discussion, as appropriate.
In this section, students build on their knowledge of the features of a picture book. They choose a landscape they are familiar with and make a landscape artwork which they share in the collaboration space.
Picture books
Students look at some children’s picture books that focus on landscape. They should become familiar with a variety. Some suggestions include:
-
Why I Love Australia by Bronwyn Bancroft
-
My country by Ezekiel Kwaymullina and Sally Morgan
-
A is for Australia: A Fantastic Tour by Frané Lessac
-
Where the Forest Meets the Sea by Jeannie Baker
-
In My Backyard by Nette Hilton and Anne Spudvilas
-
Window by Jeannie Baker
-
Our Island by the children of Gununa and Alison Lester and Elizabeth Honey. You might like to show the YouTube video Our Island by the children of Gununa with Alison Lester and Elizabeth Honey.
Ask students to consider the target audience for the books and techniques the author uses to address this audience.
Students examine the text in different books to discover how its appearance and arrangement varies. Discuss with students how choices about text can affect readability. Some general rules for accessibility include:
-
place text on a clear area of a page rather than on a busy or patterned area
-
make sure there is strong contrast between the background and text colour. You could show students how to use a Colour contrast analyser.
-
use light text on a dark background or dark text on a light background
-
use appropriately sized, clear fonts.
-
don’t use red or green text.
Language
Here, students explore the language used in the landscape picture books. They choose one picture book and search for:
-
adjectives
-
adverbs
-
words that relate to any of the five senses (taste, touch, hearing, smell or sight).
If you can access Bronwyn Bancroft’s Why I Love Australia, read the book to students one page at a time without showing them the illustrations. Ask students to imagine what landscape the words are describing. Discuss and then show students the illustration.
Students explore figurative language devices such as alliteration, personification, simile, onomatopoeia, metaphor and rhyming words. Explanations are accompanied by an example from ‘Why we love Australia’ by Nowendoc Public School students. You might ask students to focus on:
-
one of the language devices
-
a few of the language devices
-
one device per group and report back to the whole class
-
all devices, with each group member concentrating on one and reporting back to the group.
Art
This tab assists students to construct knowledge about some art techniques and how artists use these to communicate with viewers. They could study:
Students work independently to search book illustrations and/or artworks for these techniques. They choose one artwork and make written notes about it, the techniques used and the artist’s intention. Students place their information into the collaboration space, pooling their information. They use their notes to report to their group about their chosen painting and research.
Check that each group member is exploring a different technique.
Student artworks are provided as examples of these techniques but you could show other artists’ examples as well.
Note: Teachers could set up an Art Set for each technique. Consider student safety and privacy of data when setting up Art Sets.
Senses and emotions
This tab focuses on the artist’s intention. Students will develop their understanding of how artists use particular techniques to evoke mood and emotion and to represent the senses in their work. It is sometimes easier for students to understand if they are looking at two paintings which evoke opposite feelings. You might bring specific landscape works to the class to ensure students are exposed to a wide range of forms such as paintings, photographs, drawings, installations, weavings, film/video and book illustrations.
Your landscape
Students apply their knowledge of landscape artworks and art making techniques to create a landscape painting that encompasses the senses, mood and emotion. They discuss their proposed artwork and seek feedback from others as they make their work. Urge students to continuously evaluate their work and make decisions that assist them to generate meaning and to make changes as needed.
Encourage students to give constructive feedback on their group’s artworks ensuring that all works are included. You might like to set an example by commenting on some works yourself.
Reflect
Ensure students reflect on the questions under the last tab. This could be through individual reflection, including writing in a journal, and group or class discussion, as appropriate.
Before starting this section
If possible access the book My Backyard by Nette Hilton and Anne Spudvilas and complete the following activity before students begin this section.
Provide each group of students with 15 rectangles of paper (each a quarter of an A4 page) numbered 1–15 and drawing tools. Read from the book one page at a time without showing the illustration. Students discuss the landscape they imagine and take turns to make a drawing on the numbered rectangles corresponding to the book page numbers. After the reading, students order the pages on a desk so that they match the book. Students view each group’s sequence.
Discuss how each group’s drawings are similar and/or different. Why is this?
Show the students the pages of the book and discuss the writing strategies the author has used to evoke images (alliteration, personification, onomatopoeia, adjectives, adverbs, similes or metaphors).
Play an excerpt from one of the following YouTube videos:
Ask students to imagine the environment where the sounds were recorded. Students write four sentences that would evoke a visual image. Students compare their writing with the text in My Backyard, identifying similarities and differences.
Students make any alterations to their writing for improvement.
Backyard artworks
This tab introduces students to four artists with distinct styles who have made artworks to represent their backyards or nearby environments.
Brett Whiteley, The Balcony 2
John, Olsen, Entrance to the Seaport of Desire
Colin Lanceley, Songs of a Summer Night (Lynne’s Garden)
John Coburn, Kuringai
Student groups will use the study guide provided to explore the artworks and report back to the whole class. Ensure that each of the artists has been studied by at least one group. You might wish to show students other works by these artists so they begin to identify the artist’s individual style.
You could place the links to the artwork and the study guide in the Class Notebook content library or add them to an Art Set.
Students will need to understand the elements of art particularly shape, line, colour and space.
Art appreciation games
The following games will assist students to develop a deeper understanding and interpretation of art.
Veto
To encourage students to talk about the art elements and emotion in the artwork play a game of Veto.
Show the students one of the artworks and three to six words they cannot use when describing it. These vetoed words will probably be nouns and should discourage students from describing just the physical objects in the painting. You might also include some words that they must include. When students have played this game a few times they can create their own vetoed words.
Version 1: Students could play this game in competing teams. Each team has a turn of providing one to four words to describe elements of the artwork (not using the vetoed words), within a specific time. Teams are out if they fail to do this. You might provide some words that they must use.
Version 2: Provide a group of students with three or four artworks, and the vetoed words. The group chooses one of the artworks to describe to another group of students. Team members take turns to offer one to four words that are not on the veto list to describe the artwork in a specific time. You might also like to provide some words that must be used in a sentence to tell about elements of the artwork. The other students have to guess which of the artworks is being described.
Example of vetoed and must-use words
Backyard shapes
Students follow the steps in Backyard shapes (.pptx 4MB) to make an abstract artwork about their backyard or an area in the school grounds. You might prefer to direct the activity.
The steps are a guide and students do not have to stick to them rigidly. Encourage student’s individual ideas and creativity. Talk to them about the art elements relevant to their work, particularly space as it relates to composition and about their artistic intention.
The last step encourages students to look back at the work of the four Australian artists to get ideas for completing their own work. They might, for example, decide to work like:
-
Brett Whiteley, adding a colour that they find exciting and relevant to their landscape
-
John Olsen, adding lines and marks that lead the eye around the page
-
Colin Lanceley, adding three-dimensional objects
-
John Coburn, keeping the work simple with emphasis on the shapes.
Students could:
-
colour areas, detail or outline shapes with oil pastels
-
wash over the oil pastel with water colour so the oil pastel lines still show
-
wash over sections with strong and/or diluted colour for colour variation
-
add other shapes.
The ‘Backyard shapes’ PowerPoint guide also includes two interpretations of the artmaking activity.
Artist statement
The student’s Artist statement should be short, concise and written in the first person. It should provide the viewer with information they might ask for if the artist was there. It might help if students record themselves talking about their artwork first and use this as a guide for their writing.
Reflect
This is an opportunity for the students to consider their learning. This could be an individual activity or completed in pairs. You could use this as an assessment tool.
In this section, students plan their class multimedia picture book and create the landscape artworks that will form the pages of the book. They also write the accompany text.
Plan the book
Students will be required to make many decisions about their landscape picture book, such as:
-
the age of the proposed readers
-
title
-
the font that will be used
-
layout of the pages
-
the book sections to include (see ‘Book sections’ below)
-
what will be accepted as a landscape artwork
-
the landscapes that will feature (see ‘Choose a landscape’ below)
Book sections
These links might assist you to guide students writing the book sections:
How to write a preface and a foreword
What is an Acknowledgement page?
Preface, Foreword, Introduction
Choose a landscape
To decide what landscapes will feature in their class picture book, students complete the activity ‘Choose a landscape’. They brainstorm about the Australian landscape and then choose a variety to capture in their artworks.
Before starting:
-
Read aloud to your class, one page at a time, Why I Love Australia by Bronwyn Bancroft (or another book that describes landscapes). Ask students to close their eyes and imagine the landscape being described on each page. Students guess the type of landscape described. Ask them what descriptive words in the book helped them to visualise the landscape.
-
Write the landscape type and the descriptive words suggested by the students in the collaborative space. Talk with students about the words, discussing adjectives, adverbs and the language features that Bancroft has used.
-
Show students the book illustration. Discuss the illustration and how it contributes to an understanding of that landscape.
Students then brainstorm landscape types along with descriptive words for each. They add these to the collaboration space. Where possible show students a video of different Australian landscapes as stimulus. Travel videos are often suitable.
Ask a student to make a two-column table in the collaboration space and label the columns ‘Name’ and ‘Landscape’. Students add their names and a landscape for their class book page. Make sure that a variety of landscapes are represented and that all students have been allocated a landscape.
Make artworks
Students search for photographic images, artworks and/or book illustrations of the landscapes they are using and add these to the collaboration space—these will be used as a reference for their own artworks. Students create an artwork that will be on one page of the class book. They might need to revisit art techniques in the Explore picture books section or in the collaboration space.
Write
Encourage students to use descriptive language such as adjectives, adverbs and other language features to accompany their artwork in the book.
Students could read their text to classmates or to students in another class and ask them to identify the landscape type before showing the accompanying artwork. They could ask the listener for suggestions to improve the text.
Assist students to decide on class members for the task of writing the additional book sections.
Ensure students proofread their text and correct any mistakes.
Build the book
Each student uploads a photo or scan of their artwork to a new page in the online class book. They add their text and format it.
If there are other book sections to add, these should be created also. Remember, the book cover will be created in the next section.
Once all the pages (except the cover) have been created, the class should view the pages and decide in which order they should appear. Change the order of the pages and finalise the book.
Finally, ask students to think about a title of the book, if they haven’t already done so.
Reflect
Ensure students reflect on the questions under the last tab. This could be through individual reflection, including writing in a journal, and group or class discussion, as appropriate.
Working together
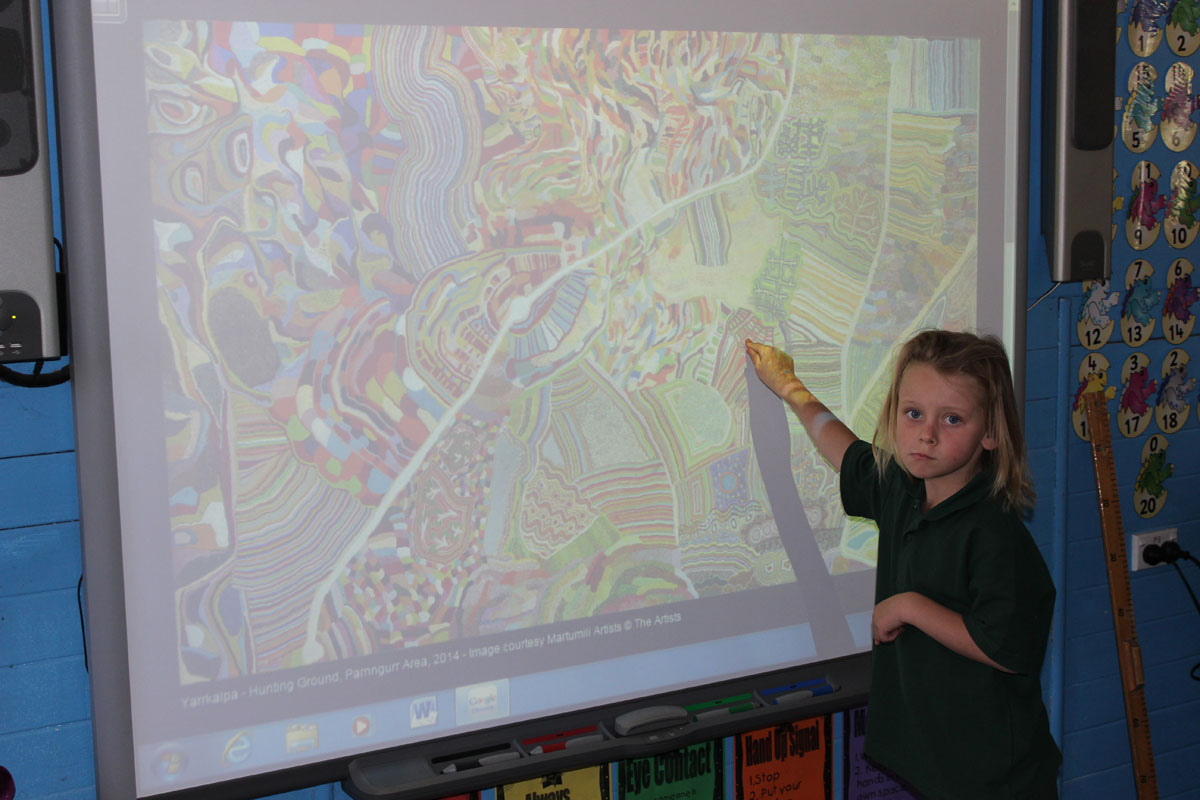
Students look at the Museum of Contemporary Art website to see images of Martu artists from the Far Western Desert working together to create artworks. They might identify how the Martu artists organise the shared work.
Students discuss the pros and cons of working alone and working with other people. They could debate ‘That people don’t like painting alone’.
Organise students in groups with each group using the study guide to explore at least one of the included Martu paintings
Book cover artworks
Students work in their groups to make large landscape paintings—one will be used as the cover of the class book. Students decide:
-
what type of artwork might appeal to the audience
-
which landscape to paint
-
the perspective for the landscape
-
how they will make the painting and share the tasks.
Students look at the Collaborative art image gallery to see the steps that one class took to make a collaborative artwork. Pause the image gallery as needed and discuss the steps the students took in their collaborative process.
Learn more about assigning student roles.
Students will need a large sheet of good quality art paper. Depending on how they choose to work and on your school art supplies, students might:
-
glue smaller sheets of art paper together to make one large sheet before they begin
-
students might work on individual sheets and join these together later.
Vote for a cover
Each group makes a pitch to have their artwork used as the cover illustration. This could be presented to the class or to another class of the age the book is intended for.
Set up a class voting system to decide on the cover to be used. Remind students they should consider each painting on its merits and appropriateness for the intended audience. Students could:
-
use Google Docs to design a digital voting form
-
hold a secret ballot with a printed voting form.
When the book cover artwork has been decided, talk with students about how the other works might be used. Students could:
-
feature the artworks on posters to promote the launch
-
photograph sections of the works to be printed on bookmarks
-
display the artworks at a book launch exhibition
-
use the artworks as inner pages or back cover illustrations.
Cover text
All students should participate in the discussion about the book title and cover image.
Assist students to decide on which class members will complete the cover and add it to the online class picture book.
Reflect
Ensure students reflect on the questions under the last tab. This could be through individual reflection, including writing in a journal, and group or class discussion, as appropriate.
This section requires students to work as cooperative learners. They will be involved in both independent and interdependent tasks and need to understand the importance of individual and group accountability. Students must understand that each person’s efforts will benefit both the group and the individual.
Publish
Discuss with students the tasks that will need to be done to complete and publish the book. Determine who will complete the different tasks. Students will need to:
-
proofread all slides and correct any errors
-
finalise the order of the pages in the book and make changes accordingly
-
add any extra pages
-
complete other tasks they identify.
The picture book will need to be made available to its intended audience. Choose the appropriate option from the ‘Share’ dialogue box (suggestion: anyone in the NSW Department of Education who has the link can view only).
Plan the launch
Students consider how they might launch their book. If they have never been to a book launch you might need to give some guidance.
Assist students to prepare a survey, for example in Google Forms, for audience reviews of the book.
Encourage students to incorporate a digital element to the launch. They could include augmented reality and/or a 3D gallery for visitors to view their original class book artworks. You might ask invited audience members to bring a device with the appropriate app loaded.
Augmented reality
To provide an opportunity to include augmented reality, students will need an iPad or smartphone to make individual videos of each class member reading the page they made for the class book. Students then use a device with the Aurasma app to take trigger photographs of the artworks and attach the appropriate videos. Viewers use devices with the Aurasma app to hover over the original artwork and the appropriate video reading will play.
Aurasma is very easy to use. View the Aurasma tutorial or the Aurasma step-by-step guide
3D gallery
Emaze offers an easy-to-use that students could use to create a virtual gallery.
Get ready
While students are preparing for the launch they will need constant teacher support. They should be encouraged to try new and innovative ideas but the teacher must also ensure their work is appropriate and safe. Check all students have tasks and that tasks are shared fairly. Emphasise that all students need to contribute for the event to be successful.
Assist students to create an audience review form. They could use:
-
Google Forms
-
Mentimeter (see the Vimeo clip: Metimeter tutorial for teachers to get started). The audience at the launch will need a smart phone to participate.
Book launch
This should be a fun event but, at the same time, students must be aware of their responsibilities to ensure the success of the launch.
Be sure to provide the audience with the Bitly link for the audience review form. The audience can access this on their smartphones or tablets and you could also have tablets set up for this purpose.
Reflect
Ensure students reflect on the questions under the last tab. This could be through individual reflection, including writing in a journal, and group or class discussion, as appropriate.
This resource was developed by a collaborative team of writers to support the department's Rural and Remote Blueprint for Action.
Collaborators:
Tracey Worth, Teacher, Nowendoc Public School
Kathy Bourke, Principal, Nowendoc Public School
Catherine Thomson, Leader Primary Curriculum, Learning and Teaching Directorate, Sydney
Davina Bowen, Teacher Quality Advisor, Tamworth Educational Services Directorate, Adamstown Office
Margaret Bradley, Creative Arts Advisor, Learning and Teaching Directorate, Sydney
Colleen Blancato and Ann Rattey, learning designers, Learning systems, Learning and business systems directorate, Sydney
Educators write your own Collaboratus resource and share with colleagues.
For more information see the Collaboratus: resource model and look for the Collaboratus template in Google Sites (DoE only).