Overview

People on the move
Everyday people are forced to leave their home for a safer country and a new life. Many countries have offered to re-settle refugees and Australia is one of them. Your mayor is asking you to help.
Listen as your mayor reads out her letter to your school.
Message from the mayor
Greetings to you, the good people of our community. As your mayor I have an extremely important message for you. Our wonderful community is about to receive a number of refugees. It is our pleasure to make them feel welcome and prepare them for life in this community.
I’ve given your teachers information about creating a refugee community resource kit. You must complete this work in a limited amount of time to ensure that all community members have all the things they need to keep our community thriving. Our community is counting on you!
Your task
Your class will work in teams to produce at least one item to be added to a class Refugee community resource kit. This will involve researching the topic and your community as well as being creative.
Starting point
How much do you know about refugees? Take this short survey3. At the end you can see the answers other people gave. Did anything surprise you? Which answers are correct?
Get organised

Work collaboratively to produce the kit as a class
Your class will work in teams. Each team will take responsibility for at least one item in the kit. Start by having a team meeting.
-
What skills do you need to make an effective team?
-
What roles do you need?
Complete these steps to help get your collaborative work started.
Before you can talk about your task you need to understand what it is, how long you have to produce it and the deadlines set for each stage. Open the ‘Culminating Task’ section lower down and read through the ‘What are you making?’ tab for information on your item.
Creating a schedule for your project should be a priority once roles are assigned.
Project planning and allocating time to different tasks and roles will be needed to make sure that your team is ready to present your progress to the class for feedback. Be prepared with an almost completed product.
|
|
To make conversations fair, respectful and useful, it’s good to develop some guidelines around how you talk and listen to each other.
Brainstorming ideas, making decisions together and resolving differences of opinion will need a range of conversation skills. These might include:
-
staying focused
-
asking questions
-
ensuring everyone gets a turn
-
making connections
-
listening carefully
-
clarifying meaning.
Create a document in Google Docs or Word Online to record your group’s guidelines for good collaborative conversations. Use the suggestions above and add your own ideas. When you set up your team’s shared workspace you will need to add this file to the folder and share it with everyone in your team.
Share tasks and responsibilities
Successful group work means that everyone contributes!
-
Everybody must have at least one job and will probably take on multiple roles. Sometimes a role can be shared.
-
Roles may change and new jobs will arise, for example, after the group decides on how to present their topic.
Check out some potential roles and responsibilities.
-
What tasks will your group assign now?
-
What tasks should be assigned before starting your research?
-
What roles might be needed as you develop your group presentation?
Download the team roles template (.docx 110kB) to organise the roles for each member of your group. Once you have set up your team’s shared workspace you will need to add this file to the folder and share it with everyone in your team.
Set up a shared folder in Google Drive or OneDrive. One group member should create the folder and then share it with the others, and your teacher.
Store all the documents and other files for your project in the shared folder. That way everyone can view and contribute to the content anytime, anywhere. In your shared work space, you need to have documents and files for:
-
brainstorming ideas together
-
a record of roles and responsibilities assigned to team members
-
a project schedule so everyone can check they’re on track
-
research notes combined into a single document
-
a database or spreadsheet of everyone’s research sources
-
storing images, audio or video for the group’s presentation
-
building an evaluation questionnaire (optional).
Discuss ways to organise your shared space.
|
|
Throughout this process it is important that you and your team reflect on your progress, experiences and even the problems. This ongoing reflection helps you get the most from your learning.
For your first reflection, consider how your group has gone so far.
-
What have you done well?
-
What could you do better?
-
How could you do it better?
Revisit these questions as you go along to help you evaluate how you are working as a team and whether your project is on track.
|
|
Discover
What is it like to be a refugee?


Starting out
Explore these online resources about the experiences of refugees to start your research.
Focus on the class kit
-
Brainstorm ideas about how the kit will provide a ‘sense of belonging’ for new refugees in your community.
-
Add your ideas to a presentation document and share with the whole class. What ideas can you borrow from other teams?
Thinking about your team item
Research and discuss the questions and ideas in the links below. The information you produce will help you work out how to design your item and how to meet the needs of your audience.
Ensuring your information is credible
Researching controversial topics like refugees requires you to have a strong focus on whether your information is credible and whether your source is reliable.
Watch this YouTube video for an example of a system you can use to evaluate sources6. Another option is to check out this Canadian website which has useful resources including an educational game designed to teach you how to make good choices about websites7. The game needs Flash to work. If in doubt discuss the source with your team.
Culminating task
Reflect on your progress so far:
-
How has your research influenced your decisions?
-
Describe something you learned that made you angry, sad or happy.
-
How can your team use their feelings and new knowledge to influence their design?
Next, break down your task:
-
What is the purpose of your object?
-
What is your goal in creating it?
-
How you will complete it in the time you have left?
Why an infographic?

The colours and simple images of an infographic help people understand facts and figures more easily. Many people do not have accurate information about refugees. Your task is to create an infographic to help people understand the facts more easily and interact more confidently with refugees.
Starting the research
-
Research at least two facts each. Focus on facts that are not well-known or are commonly misunderstood. You can start with the information from the survey in the ‘Overview’ tab or the Roads to refuge10 and other reliable websites.
-
Save and share links to your facts in your shared folder. Discuss each fact and decide on which ones to include in your infographic. Be sure to select facts that complement each other but do not repeat information.
-
Use your time and the size of your infographic to determine how many facts to include. Too many facts will make your infographic hard to read.
Publicity
Once you have created your infographic you need to work out how to publicise it. Where should copies be displayed? Who do you need to speak to for permission to put in public places?
Why make a community blanket?

The students of Oberon High School were inspired by reading ‘My Two Blankets’ to design and create their own community blanket.
‘My Two Blankets’ is a picture book about belonging that uses a blanket as a metaphor for the sights, sounds and memories that we surround ourselves with, that we find comforting. Refugees who come to our communities will have sights, sounds and memories of their old home that help them feel safe. In welcoming them to your community with a blanket you are trying to create a safe, warm space for them within your community.
How will it be used?
The community blanket could be for display in your school or somewhere in your community, like a refugee support centre, to remind community members and refugees of the places, people, events and experiences in your community that could help them feel welcome.
Alternatively you could create a useable blanket to give to a family as part of their welcome to your community.
Starting out
You do not need to read the book to make a blanket but if you can get it from your library, or your teacher, it will help you plan what images or ideas you could include. Brainstorm a list of the things in your area that could make refugees feel safe and welcome. Select at least four of these for your blanket depending on the size of the individual squares. You may like to use the concept in the photo or make the squares smaller.
Why make a video of your school community?

Videos are useful tools for spreading information to your whole community. Your video can either:
-
educate your community about the benefits of refugees and how people can help make them welcome
-
or act as an introduction to refugees to help them learn about your community.
What should be included?
You can use interviews or vox-pops with community members or refugees who can talk about the community and positive welcoming strategies. Other ideas include information on people, places and significant events in your community.
What issues need to be considered?
Making a video will require think about lighting and background noise. Places with natural light and little background noise are best. This is a great chance to learn about scripting, creating storyboards, sound and lighting effects.
This example of a Google Map suggests some places in Sydney to sit and have lunch. Click on the menu in the top left hand corner for options or open Google Maps in a new window13.
Why make a Google map of your community?
Many refugees have used Google Maps to map their journeys across the world in search of safety. Interactive maps are a great way of sharing information about places and showing routes to take between locations.
Useful locations
Google maps are useful for people new to the community because they show things like your local library, police station, medical (bulk-billing) centres, child minding facilities, sporting and community clubs. Think about how you can add places based on your knowledge of the local area, such as the best places to:
-
meet friends and socialise
-
eat the yummiest cakes
-
see the most beautiful scenery
-
learn about the community
-
keep safe and well
-
buy items for school at the lowest prices
-
swim, skateboard, walk or run or generally exercise.
Wider community benefits
Creating an interactive map will let you share your local knowledge with the wider community. It is possible to suggest the locations you have added to your map to Google to add to the map that the whole world sees. Can you find out how to do that?
Why create a rap song or poem?

Music, poetry and spoken word performances are a powerful way of creating social change and speaking to a community. Rap music in particular has a strong tradition of speaking out on social justice issues in Australia.
Real world examples
Have a look at how people like you have used music or poetry to educate or inform their communities:
-
Bankstown Public School used rap music to help their students address the issue of domestic violence and educate their wider community about the importance of standing up. Read this ABC News article ‘We All Say No’15.
-
Music is used by organisations such as the Music Outback Foundation16 to support Indigenous Australians to celebrate their culture and educate the general public about their land, their language and their people.
-
The Unleashed festival17 is run to inspire young people to create change within their communities and in the wider world. They use music, speeches and spoken word performances to speak out and encourage thinking, making and innovation.
Making people think
Words in the form of poetry and music have been inspiring emotions and thoughtful discussion in people for years. Read this poem about refugees written by Brian Bilston18. It presents different perspectives on refugees. Discuss how it made you feel reading it from top to bottom and bottom to top. How can you create feelings and deep thinking in the audience of your creation?
Why make a non-spoken guide for getting to know the community?

A non-spoken guide is a pocket sized booklet with images that help community members communicate important information to newcomers who are still learning English. Your booklet will help students communicate in school or families communicate in the local area.
What to include?
Suggested ideas to focus on include:
-
photographs of school areas or staff with a simple description of what they do or why you would go there
-
images of important people (that is a doctor or the police) or services to help refugees if they need help
-
photographs of yourself showing how you could mime polite interactions like “Hello how are you” to enable community members to communicate.
Appearance
Your guide will be more specific and visually appealing than the example in the picture but this image gives you some ideas about how to communicate the important information that new arrivals to your community might need.
Nonlinear designing
This interactive image shows how nonlinear the design process is. Each cog moves and impacts the other cogs. As designers your team will need to move back and forth between the stages in order to create your final item.
It’s not working!
If you are having trouble seeing the information in this interactive image, use the links below to access content.
Use what you know
For this project your team should try to use software or skills they already have so check with your team to see if anyone else can help you solve your problem. What about the other teams? Can you negotiate to share knowledge or skills with anyone else in your class?
Search for ‘How-to’s’
If you know what you want to do but not how to do it, the internet is full of ‘How-to’ instructions. If you need to watch a YouTube video ask your teacher for access.
Finding a tool
Another option is this handy Learning tools selector21 that will recommend software or apps that you have access to through your school account.
None of that worked…
The following sections contain helpful links but often the best way to solve your problem is to be creative. What software or equipment can you already use and how could you adapt that knowledge or skills to do this new task?

Choosing software
Making an infographic does not need special software, MS PowerPoint or any of the image editing tools you have access to will work well.
Alternatively, there are a number of free online infographics creators. Generally, they require you to sign up and will limit your choices if you do not pay for premium services. Venngage is a good option as it is easy to use.
Venngage
-
Watch a YouTube video about making Venngage infographics23.
-
Set up an account on the Venngage website24.
-
Explore the software, try and work out how to use it.
-
Venngage has written a helpful ‘Getting started’ guide on infographics25.
-
Some step by step instructions on Venngage basics.
What your blanket looks like and how it describes your community is up to your team.
Making a blanket
The following links describe ways to make your blanket, as well as giving you some background information on quilting and blanket making as part of native people’s story telling.
-
Very basic instructions on different ways to make a blanket26.
-
Ask your teacher to help you watch this You Tube video on a quick and easy way to make a blanket27.
-
A set of instructions for Canadian teachers to help their kids make story blankets and learn about their native people’s traditions28. It could be useful to you because it contains simple instructions on how to create your story panels and suggests materials you can use.
-
Useful information on using quilts to tell stories29 and at the bottom of the page are some easy to follow instructions on quilting.
-
This ‘Instructable’ has simple and clear instructions on what you need and how to make a quilt30.
-
Detailed information about how to prepare your blanket for wall hanging31 if it is going to be a display item.


How-to’s
The ‘Australian centre for the moving image’ has helpful resources that walk you through video production from start to finish35.
The ABC Open ‘What’s your story?’ website has videos on how to make a video easily and use your phone or iPad to do it36.
The ABC splash site also has learning resources such as:
This Ed Tech teacher website has detailed information on the steps to follow to create a video and suggests some possible software39.
Software
There are many different software options for video editing; your team should use one you are already familiar with such as Adobe Premier or iMovie.

How-to’s
-
Step by step instructions on creating an interactive Google map are available in Google Maps41.
-
Similar information with helpful images to explain the different options you have when creating your map42.
Suggestions
Your map can be useful to more than just refugees. There are changes and additions that you can make to Google Maps that will benefit everyone in your community. Check out these ideas:
-
Find out where you have been to provide ideas for places to suggest on your custom map43.
-
Fix mistakes or add reviews in your local area.

Writing Tips
Writing a rap song or poetry requires very similar skills. These links will help you construct your words and make them as meaningful and rhythmic as possible:
Creating a rap song
Here are some useful instructions on breaking down your song48 into beats, sections and words, as well as suggestions for finding samples to use in your track49.
Recording and Editing
Garage Band and Audacity are easy to use programs that will allow you to record and edit your work.
These links will help you record the best possible sound.
-
Step by step instructions for making a rap song sound as professional as possible50. You may not have access to all this equipment but the suggestions around controlling sound while recording are very helpful.
-
This site has information about recording without equipment51 other than your phone or laptop and a microphone like the one that came with your mobile earphones.

There are a number of ways you can make your guide. You could make a foldable sheet or a booklet. If you are going to make a booklet then you need to consider the size. Depending on the size of booklet you want to make there are a range of options.
Printing templates
MS Word has ways to make a booklet using the print options. This link is the official Word help file for creating abooklet52 and this one is a 'How to' that uses pictures to explain creating printable booklets in MS Word53.
For help with printing and folding your booklet check out these free folded leaflet templates54.
Instructions for a foldable sheet
Those template booklets are not truly pocket sized however. You could instead, try this clever DIY How to Make a Pocket-Size Book55.
Digital booklets
Another method is to use the ‘simplebooklet’ add in for Google Drive. This method creates a digital file you can share but is not able to be downloaded or printed without a paid account. Here are some instructions for using the simplebooklet add-in.
Remember you will need to present your work for feedback
-
Try to make sure that you can justify your design decisions.
-
Keep notes on your working ideas and any changes you make in your shared documents so that the whole team knows what’s going on.
-
Reflect regularly on your progress.
Present

Creating your presentation
At least a week before you complete your allocated item, you will need to present your progress to the whole class. Follow the ‘Tools for presentation’ link to find suggestions for software you can use to show your work.
|
|
Collecting feedback
This is a chance to obtain valuable feedback to help your team improve their final product. A survey to gather information or a discussion after you present the item gives you a chance to collect impressions and suggestions. It’s a good idea to make sure at least one person records the feedback so you can discuss it later.
Information to include
To prepare for the presentation your team can use the following points to guide them:
-
Explain the name and purpose of the item your group was allocated.
-
Describe the problems you faced in designing the item and how you overcame these.
-
Demonstrate how the item looks and functions.
-
Ask for questions and/or ideas for improvements.
Reflection
Evaluate your work at each step

You will have been evaluating and reflecting on your work throughout this project, now, evaluate your presentation and what you learnt from the feedback.
-
What changes do you need to make?
-
What jobs have to be allocated to team members?
Add to your personal reflection file.
-
Did preparing to present your work help you think about what you have done?
-
How did the presentation go?
-
What would you do differently next time?
-
What made you proud of your team? Or yourself?

After your team has completed your item and the class kit has been properly presented it is important to complete a final reflection. This can be a team or an individual process.
In creating your item for the kit:
-
What have you learned that you didn’t know before?
-
What was successful about your team’s presentation?
-
What is one way you could improve the kit item or presentation?
Thinking about collaboration:
-
Name the best thing about collaborating with others to research and present your topic.
-
Name the most challenging thing about collaborating with others in this project.
-
What did you learn about yourself as you worked with others?
Information for teachers
This cross curriculum resource supports students in NSW Stage 4 English, Geography and Visual Arts. It also supports student-centred, project-based collaborative learning using G-Suite and/or Office 365 as well as other online tools. With minimal adjustment to assessment outcomes this could also be run as Stage 5 or Stage 6 unit of work.
Students work collaboratively to make items that create a Refugee community resource kit which supports the integration of refugees within their community. The suggested duration is 5+ weeks.
All Syllabus outcomes referred to in this resource are copyright Board of Studies, Teaching and Educational Standards NSW.
Picture book study – ‘My Two Blankets’
This unit of work provides an opportunity to focus on visual literacy.
Picture books that could be used in conjunction with Irena Kobald’s ‘My Two Blankets’:
-
‘The Island’ by Armin Greder
-
‘Home and Away’ by John Marsden & Matt Ottley
-
‘The Little Refugee’ by Anh Do & Suzanne Do
-
‘A Children’s Guide to Australia Fair’ by Lizzie Chase
English Syllabus K-10
-
A student effectively uses a widening range of processes, skills, strategies and knowledge for responding to and composing texts in different media and technologies. (EN4-2A57)
-
Text features - Recognise salience and symbolism in picture books
-
Identify themes - Refugees and belonging
-
Students:
-
Use a range of software, including word processing programs, to create, edit and publish texts imaginatively (ACELY1728)
-
Create imaginative, informative and persuasive texts that raise issues, report events and advance opinions, using deliberate language and textual choices, and including digital elements as appropriate (ACELY1736)
-
Create literary texts that draw upon text structures and language features of other texts for particular purposes and effects (ACELT1632)
-
-
-
Mid way down the Literacy Activities page is a ‘Read for Australia’ document on using My Two Blankets with Stage 4 English students58.
-
Compare and contrast with the art and story in ‘My Two Blankets’ with the web comic ‘Madaya Mom’ which tells the story of a family trapped in Syria59.
-
The journal Scan (you will need to navigate to Volume 36 Issue 1) contains a review of My Two Blankets with a visual literacy teaching focus60.
Why do people’s perceptions of the liveability of places vary?
-
Content: Why do people’s perceptions of the liveability of places vary?
-
What effect does environmental quality and access to services have on people’s well-being?
-
Concepts - Place, interconnection and change.
-
Skills - Acquire, process and communicate geographical information in maps, graphs and statistics, visual representation in flowchart and multimedia.
Geography Syllabus K-10
-
A student locates and describes the diverse features and characteristics of a range of places and environments. (GE4 - 161)
-
A student explains how interactions and connections between people, places and environments result in change. (GE4 - 362)
-
A student explains differences in human wellbeing. (GE4 - 663)
-
A student acquires and processes geographical information by selecting and using geographical tools for inquiry. (GE4 - 764)
-
A student communicates geographical information using a variety of strategies. (GE4 - 865)
-
The Phillips Centre for Health and Well-Being has a chart called 'Insight Series on Liveable Cities' which explores what makes a city liveable66.
-
Compare changes in refugee circumstances using the UN Global Trends report for 201367.
-
To help students visualise world inequity over time use the Gapminder Wealth and Health of Nations interactives68.
-
In order to visualise world inequity have students explore The StatSilk Life Expectancy interactive world map.69
-
In 2015 ‘The Economist’ magazine wrote an article discussing the ranking of the world’s most liveable cities70.
-
Economic information and country profiles are available on the website of ‘The World Bank’71.
-
‘The World Post’ article ‘After 4 years of war, why are so many fleeing Syria now’72.
Artistic representations of refugee journeys
This unit could be approached from a variety of angles:
-
Students could study the picture book ‘My Two Blankets’ by Irena Kobald with a focus on the subjective and cultural frames.
-
Students could look at how art can be used for political protest and to reach across cultures using ‘A Children’s Guide to Australia Fair’ by Lizzie Chase73 as a starting point.
-
Students could study the work of contemporary artists who were or are refugees, like the Telling Tales art collection74 at the Museum on Contemporary Art in Sydney.
-
Students could take part in take part in Refugee Week by creating art75 to raise funds, raise awareness or even enter an art competition with a Refugee theme76.
Visual Arts Syllabus Years 7-10
-
A student recognises and uses aspects of the work as a source of ideas, concepts and subject matters in visual arts. (Representation 4.477)
-
A student investigates ways to develop meaning in their artworks. (Conceptual strength and meaning 4.577)
-
A student selects different materials and techniques to make artworks. (Resolution 4.677)
-
A student begins to acknowledge that art can be interpreted from different points of view. (Frames 4.977)
-
Collections of Asian art around Immigrants and refugees – The Asia Art Archive79.
-
A range of teaching resources including a link to the Traces Project which is documenting the contribution of refugee artists in the United Kingdoms can be found at the UK Refugee Week website80.
-
Look at this article from ‘The Conversation’ about the access that refugee artists have to the creative community in Australia81.
-
This page contains links to a secondary schools education kit from the Casula Powerhouse Art Centre which held an exhibition of International artists with a refugee background in 201682.
Learning across the curriculum
‘Refugees welcome here’ provides opportunities to address cross-curriculum content in the NSW English K-10 syllabus83, the NSW Geography K-10 syllabus84 and the NSW Visual Arts 7-10 syllabus77.
-
Indigenous perspectives
-
Indigenous perspectives and culture are part of every Australian community. The Kit could include some resources about Indigenous beliefs and sacred sites in the local area.
-
-
ICT
-
Students have opportunities to engage with ICT throughout this project, from working collaboratively to plan, organise and assess their group work, to researching their chosen topic, to creating and communicating their ideas and information in a presentation.
-
-
Literacy
-
Students engage with literacy in designing and making the items for the Kit. Each item has a specific audience and purpose.
-
-
Numeracy
-
Suggested topic areas provide opportunities to engage with numeracy, including travel/transport (time, distance) and budgeting (money).
-
-
Personal and social capability
-
Students work in teams to effectively collaborate on planning their group work, and researching and developing a presentation to communicate their ideas. They will respond to challenging situations constructively, including interacting confidently and with empathy in social situations and functioning within the ‘real world’.
-
Students have the opportunity to assess and adapt their individual and collaborative skills for learning with increasing independence and effectiveness.
-
-
Work and enterprise
-
Students have an opportunity to explore life as a refugee.
-
They develop work-related knowledge, skills and understanding through a variety of experiences and develop values and attitudes about work environments including working in groups, oral and written skills, safe work conditions, and rights and responsibilities in the workplace.
-
Ensure that students practise good digital citizenship by attributing information sources and use of third-party material. This includes providing correct attribution and copyright information for images.
Useful links:
The NSW Department of Education Libraries website88 is a font of useful information on a wide range of topics.
Teachers may wish to consult the Controversial Issues in Schools Policy on the Department of Education's website89.
-
Current information and first person stories are available on the UNHCR homepage94.
-
RacismNoWay education website96 for Australian schools.
-
2015 UHNCR subregional operations profile for Northern, Western, Central and Southern Europe98.
-
UNHCR News story 'Looking for safety and a better life in the Calais’ Jungle'99.
-
News article 'Germany and France volunteer to take Mediterranean refugees'101.
-
News article 'Crush in Calais tests French attitudes on immigration'102.
-
Independent information for refugees and migrants coming to Europe is available on the Website 'Welcome to Europe (w2eu)'103.
-
Compass episode on a Sudanese family being welcomed into Dorrigo - "A Small Town Welcome104".
-
The Key of Sea is an album of musical collaborations between Australian artists and asylum seekers105. These artists have brought their musical skills and culture; the groups are joined together in search of a common goal - unity through music.
-
There are 60 000 selected recordings of music, spoken word and environments in the British library “Sounds” collection106.
-
Click on a map to hear music from that region using the World Music Network website107.
Stories that explore the experience of refugees
-
Edited by Lyn White, ‘Through my Eyes’ is a series of books108 that focuses on children living in contemporary conflict zones. Extracts, teaching notes and activities are included.
-
Cast From the Storm is a documentary about teenage refugees using drama to tell their stories110 .
The Department of Education is committed to eliminating racism through educating students, teachers, parents and involving the whole school community.
-
The Anti-Racism Policy111 applies to all department employees and students.
-
Guidelines for the implementation of the policy, indicators of racism in schools, its effects and strategies for countering racism can be found in the ‘Anti-racism education – advice for schools’ document, located on the policy page.
To enable students and staff from all cultural, linguistic and religious backgrounds connect and succeed in the learning and working environment, the department is committed to building inclusive and racism-free school communities. An understanding of the nature of racism, its manifestations and effects is required to effectively counter it in schools.
-
Access information to help schools understand and counter racism, and learn more about professional learning and resources available on the Anti-racism education page112 of the Multicultural education website.
-
Anti-racism education programs, strategies and resources for use in Australian schools are also available on the ‘Racism. No way!’ website96.
Culturally inclusive practice is important at the whole school level and the curriculum, or classroom, level.
-
Information and resources to support schools in providing culturally inclusive practices is available under the ‘Culturally inclusive curriculum’ heading on the ‘Cultural inclusion’ website113.
Learning and teaching programs need to include the ACARA learning across the curriculum general capability ‘Intercultural understanding’114 so that all students learn to value their own cultures, languages and beliefs and those of others.
21st century learning design (21CLD)
This project targets 21st century learning skills including:
-
collaboration — do learners make substantive decisions together? Is their work interdependent?
Students will work collaboratively to decide:-
what roles are needed and who will fill them
-
how roles will change over the project
-
which story to produce
-
how to create a story in the chosen medium which draws on the work of the whole team.
-
-
knowledge construction — do learners make connections and identify patterns? Do they apply their new knowledge to new contexts?
Students will construct knowledge as they:-
identify the features of different types of texts
-
use their knowledge of true stories and different media to produce their own stories
-
use their knowledge of how composers engage responders to produce an engaging story.
-
-
skilful communication — do learners produce substantive, multimodal communication? Do they reflect on the process of learning to improve their communication?
Students will communicate skilfully as they:-
give feedback to peers about their work
-
reflect on feedback to improve their work
-
try to persuade peers to choose their own story for production
-
use multimodal forms of communication to organise and create their group projects.
-
The article What is co-operative learning: More than just working in groups115 identifies five key elements that differentiate cooperative learning from simply putting students into groups: positive interdependence, individual accountability, face-to-face interaction, interpersonal and small group social skills, and group processing.
Below are teaching ideas relating to each section of this resource. Although students will work through these sections mostly in order, the design and collaboration process is not linear. Encourage students to look at the ‘Culminating Task‘ section while they work through the ‘Get Organised’ and ‘Investigate’ sections to help inform their decision making.
This document, ‘Downloadable teaching notes’, contains a printable version of the ‘Before teaching’ information from each of the sections below. (.docx 113kB)
Grouping
Decide how to group students. For example, do students choose their own groups, are groups randomly assigned (such as picking group numbers from a hat), or do you assign members to ensure a mix of ability and learning styles?
Timeline
Decide on timeline and lesson allocation:
-
How long will students have to research and develop their item for the kit (allow at least 2–3 weeks)?
-
What date will groups present their item to the class for feedback (allow at least one week before final presentation of kit)?
-
What date will class present their complete kit?
Assessment
How much and what bits of the task will be assessable? Suggestions for assessing different stages of the task can be found in those sections. A major part of the assessment should focus on the development of collaboration and 21C skills in students. See the ‘21CLD’ tab in this section for suggestions for areas to focus on.
How much are you expecting students to do at home?
Celebration of work
It is vital to celebrate the completion of the whole kit as this makes the task real world and urgent for student engagement. Celebration could be achieved by presenting the kit to a Refugee representative, your local council or other organisation or at minimum at a school assembly. Additionally, putting parts of the kit on display in the school front office and in the newsletter will broaden the audience.
Ask students to listen to and/or read the message from the mayor and identify the audience and purpose for the kit.
Whole class input
Hold a quick class discussion about items for the kit. Allocate at least one item to each group. The suggested items are:
-
infographic
-
community blanket (Students taking this option would benefit from access to the picture book ‘My Two Blankets’).
-
video
-
google map
-
poem or rap song
-
non-spoken guide
The survey
Students will need to take this survey individually for the most honest responses. Their answers are not visible to others but mixed with all other students at other schools who have completed this unit.
Displaying the result for the whole class to see can prompt a strong class discussion of the topic and misconceptions. Having a class discussion on the results before examining the facts will help provoke cognitive dissonance in students with misconceptions.
True/false answers from Survey
-
False - Home to 1.6 million refugees, Turkey has hosted the largest number of immigrants so far this century. Reference: The Guardian116
-
False – An asylum seekers are people seeking protection as a refugee and are still waiting to have their claim assessed. A refugee is defined by the 1951 Convention Relating to the Status of Refugees (and its Protocol), to which Australia is a signatory. A refugee is ’Any person who, owing to a well-founded fear of being persecuted for reasons of race, religion, nationality, membership of a particular social group or political opinion, is outside the country of his/her nationality and is unable, or owing to such fear, is unwilling to avail himself/herself of the protection of that country’. Source – Reference: Amnesty International website117.
-
True - The United Nations High Commissioner for Refugees registers and tracks Syrian refugees in camps spread over several nations, including Turkey, Lebanon, Jordan, Iraq and North African countries. According to numbers as of Dec. 31, 2015, the total comes to more than 4.6 million. Reference: Politifact Fact checker118
-
False - according to numbers as of Dec. 31, 2015, the total comes to more than 4.6 million. Of those 4.6 million, 50.7 percent are female and 51.8 percent are children (boys and girls) 17 years old or younger. So the majority of refugees are women and 17 years of age or younger. Reference: Politifact Fact checker118
-
False - applying as an asylum seeker is the normal way of seeking protection as a refugee. Resettlement is meant to act as a complement to other strategies for protecting refugees, not a substitute for providing protection to refugees who arrive as asylum seekers. Reference: Refugee Council of Australia119
Timeframe
Depending on your class this section could take less than one period or might need to be scaffolded and take more than one session to complete. Read through the steps carefully and decide how much scaffolding you will need to provide.
ICT resources
For many of these tasks (and in the later sections) every student will need access to an internet connected device.
-
If this is not possible, how much can students do offline? It is possible to download a copy of this entire resource in a zip folder from Scootle. Although the external links will not work students can still access all the content inside this resource.
-
Which activities could groups manage with one device per group?
-
Do you need to book devices for your lessons?
-
Do you need to warn anyone that your students may be using a lot of bandwidth?
-
Are there any equity issues around students not having internet access at home?
Collaboration
Highlight that this is a collaborative task: team members will work together to research and to prepare and present the demonstration of their learning. Start a class discussion on the best way to handle collaboration between students using the following chart.
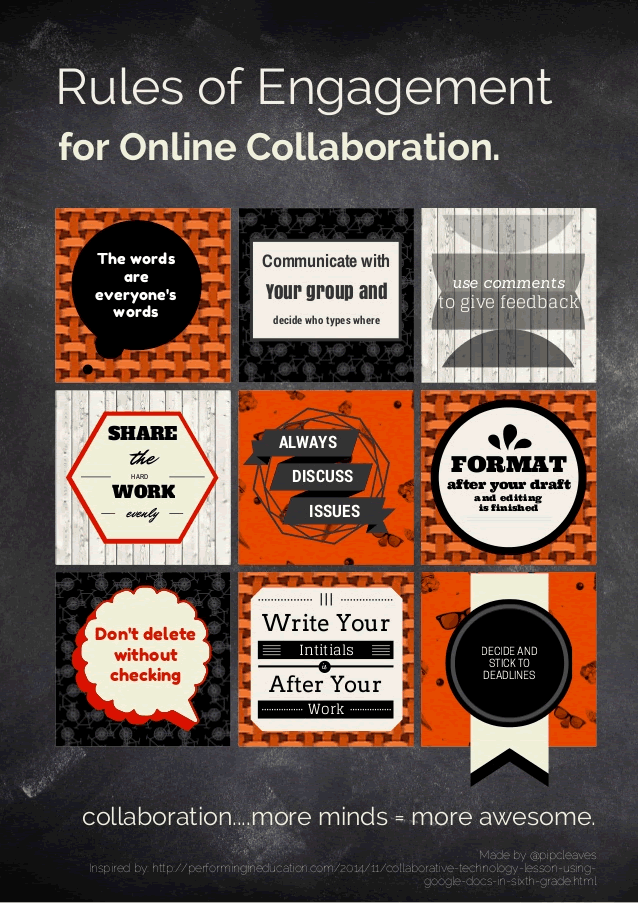
(Text version – Rules of engagement for online collaboration)
Directions for getting started
In order to start planning direct students to look at the ‘Designing your item’ tab in the ‘Culminating Task’ section. This will scaffold the design process for them. If necessary go through this tab with your whole class at the start of the lesson to re-orient them to the task.
Tasks
Students should work through the five teamwork activities, beginning with setting up a shared work space. These steps guide students to establish a collaborative and constructive working group. At the end, students should have a shared workspace in Google Drive or OneDrive that contains:
-
discussion guidelines
-
some kind of timeline or project organiser document that contains deadlines for feedback presentation and final due date
-
a roles and responsibilities document
-
a group reflection document
-
students should have an individual reflection file of some kind that is shared with you but not their peers.
Project management
Encourage students to use project management software. For classes needing greater scaffolding:
-
help them to break their task down into smaller pieces
-
give them clear deadlines for the feedback presentation and the final due date for presentation of the completed kit.
Your access
Ensure each group gives you access to their workspace so you can monitor progress and support students as needed.
Aim of research
The aim of this section is that students develop an understanding about:
-
what it is like to be a refugee, before and after arrival in their local community
-
the fear and danger that refugees would have faced
-
the desire for safety and comfort that motivates them
-
the common need for peace and freedom to ‘fit into’ the local community.
Resources
-
Coordinate the research task of this project with the school librarian.
-
Preview the ‘Road to refuge’ website and the SBS interactive. If these do not seem suitable for your students look at the ‘Other resources’ section under the ‘Curriculum’ tab in this section for more options.
-
Check that the school internet can handle multiple students accessing the interactive resources at the same time.
-
What is your plan for total lack of internet on the day? It is possible to download a copy of this entire resource in a zip folder from Scootle. Although the external links will not work students can still access all the content inside this resource.
Class wide sharing
In this section students are asked to share their findings with the whole class on a presentation document. Create this beforehand and make sure that the whole class has access to it though Office 365 (PowerPoint Online or Sway) or G-Suite (Slides).
Credible sources
Students may need access to specific training on source evaluation at this point. Refugees are a controversial topic and you should refer to the relevant Department of Education policy for guidance on controversial topics120.
The following resources can be used by or with students to think about how they evaluate sources:
To help your students make good choices about information sources access the following resources:
-
sample evaluation sheet for students to use with websites from readwritethink.org123
-
the ‘Effective reading’ Quick guides from the Southern Cross University website124
-
the ‘Choosing credible sources’ page from the Illinois Valley Community College website125
-
Kathy Schrock has some evaluation sheets that are licenced for classroom use on her Critical Evaluation page126.
Blanket specific preparations
Students wanting to create a blanket will benefit from access to the picture book ‘My Two Blankets’ even if this unit is being taught with a Geography or Visual Arts focus. If you cannot find that book other suggestions include:
-
‘The Island’ by Armin Greder
-
‘Home and Away’ by John Marsden & Matt Ottley
-
‘The Little Refugee’ by Anh Do & Suzanne Do
-
‘Refugees’ by David Miller
-
‘Ali the bold heart’ by Jane Jolly & Elise Hurst
Creating a survey?
Decide whether you want the class or each group to create and send out a survey to the wider community. This has the potential to be contentious but also acts as an opportunity to get students focused on data and using data to inform their decisions. The survey is suggested as a possible strategy for groups, even if it is not made mandatory. Students should ask the questions of people outside the classroom such as family, peers and even the wider community if suitable.
Timeframe
This section is envisioned as taking more than one period. Students will need time to:
-
brainstorm in their groups
-
share brainstormed ideas with the class in a shared document
-
find factual and credible information based on the suggested questions
-
discuss it within their groups
-
create a group research document
-
reflect on their progress at regular intervals.
Referring to the item specifications
Direct students back to the introductory information for each item in the ‘Culminating Task’ section. Each group will find item specific links and references to guide and scaffold their investigations.
Early designing
If students are excited to start designing their item during this phase make sure they review the ‘Designing your item’ tab in the ‘Culminating task’ section. Stress the importance of following a proper design process to avoid wasting time and producing the best possible result. Instilling this process into your student’s ways of thinking is a big part of 21st century learning. You could even remind them that these are the skills that a future employer will want them to have.
Some classes would benefit from a review of the design process at the beginning of each section to remind them where that stage fits into the overall process.
The design process
This section specifically guides students through the design process. As discussed earlier students should have looked through this section earlier on in the unit to help inform their decision making, organisation and investigation but they should now dig into the details of the design process. Stress the non-linear nature of the process and that they should be willing to make mistakes and then learn from them.
The design process used in this section is adapted from the Design Thinking for Educators Toolkit127 which is a wonderful resource for teachers that you might like to use in your general practise or as a starting point for designing your own Collaboratus unit128.
Assessment
To ensure equality of assessment across the range of possible kit items your rubric can focus on the collaboration, communication and problem solving skills used and acquired by students. In designing your rubric think about the following questions:
-
How did the students work together?
-
How did they overcome problems?
-
How did they respond to feedback?
-
How well did they take responsibility for their roles and assigned tasks?
-
How well did they communicate their learning throughout the process and in the end product?
For more information on future focused skills and how to design lessons and units with them in mind see the 21st Century Learning Design Rubrics129 document.
Resources
A number of the items in the kit require or would benefit from access to specialist equipment:
-
at least one sewing machine for the blanket
-
a good quality microphone and mixing equipment for music production
-
video camera and microphones for film production
Read through the expandable link for each item and prepare for possible student requests. Do you need to speak to people in advance for access to equipment?
Controversial issues in the rap song and poem option for the Culminating task.
As part of encouraging students to prepare for creating a rap song or poem, students are prompted to read this poem about refugees written by Brian Bilston18. Depending on the background and cultural views of your students this could be a controversial topic. You should prepare in advance to mediate discussion between students with passionate viewpoints. For resources to support you in this effort see the ‘Anti-racism support’ expandable, inside the ‘Other resources’ expandable, in the ‘Curriculum’ tab of this section ‘Information for teachers’.
ICT considerations
Make sure the suggested links work through your school network and filter. To ensure students do not waste time supply alternative links where necessary. For students in need of greater scaffolding, direct them to use specific sites or how-to instructions.
The ‘Troubleshooting’ section
This section deliberately encourages students to try and figure things out for themselves. 21CL has a focus on problem solving and lateral thinking.
Scaffolding
Depending on your class you may need to scaffold them through the design process with directed lessons on each step. The ultimate goal is that students will develop the skills to apply this process in their individual and group work throughout school and into their work life. Your class may benefit from having this goal explained explicitly throughout this unit of work.
Encouraging collaboration
-
Your class may benefit from a brief reminder of their group discussion guidelines at the beginning of each period.
-
If the teams are working independently you will find yourself in the position of a facilitator who is providing advice and requested resources on an as needed basis.
-
Use your access to each group’s shared files and your observation skills to determine when intervention and moderation of discussion or decision making is needed.
-
Try to avoid intervening straight away to give students a chance to resolve problems on their own.
Experimentation and prototyping
Put an emphasis on trial and error and trying things out first. Encourage students to make rough versions and test for issues rather than strive to be perfect the first time around.
Software
There are many software tools that students can use to present their progress for feedback. You might ask students to use tools they already have access to or are familiar with. Limiting the choice of tools to 1 or 2 options will assist students who need more direction.
|
|
Assessment
If you are assessing this presentation as part of the project Technology rubrics for any classroom130 is a resource that provides guidelines for assessing digital student work in a variety of modes and media. Use these alongside your regular content and syllabus focused outcomes. How well does each team explain their design decisions and the problems they faced?
Explicitly teaching feedback strategies
To ensure feedback is supportive and helpful your students will benefit from a range of strategies to enhance peer feedback131.
Data collection
Ensure students look at their presentation as an opportunity to collect data from their audience. Evaluate whether your class will also need you to collect data on peer feedback to help them refine their work.
Evaluating and reflecting on content and the learning process is a critical part of 21st century education and is encouraged throughout this resource.
Highlight the importance of continual reflection
The ‘Evaluate’ section addresses both audience evaluation and reflecting on one’s own learning. Introduce this section before student presentations so groups have time to make an audience feedback form or quiz if appropriate.
Regular reflections
In the ‘Get organised’ tab, the resource suggests students keep a learning log during the project. Follow your regular reflection or journaling routines, or guide students to use online tools to capture their thoughts.
Your practise
As an educator you can model reflective practise. Think about:
-
How can you improve on the delivery of this project?
-
What have you learned about embedding 21st century skills into a learning experience?
-
How did you modify this resource to better meet the needs of your class or community?
Students could follow up this project with:
-
An exploration of whether the cultures refugees come from have a ceremony similar to the Indigenous Australian Welcome to Country. How are they the same/different from a Welcome to Country?
-
A class discussion on what their school could do to make refugees feel happy and safe in their community.
-
A class discussion on whether fundraising could support refugees and what they could spend money on to make life easier for refugees.
-
Writing or reflection on their personal view about refugees.
This resource has been developed by a collaborative team of writers to support the department's Rural and Remote Blueprint for Action.
Collaborators:
-
Ruth Grace, Teacher Librarian, Oberon High School11, Oberon
-
Holly McTrustry, English, Drama and Dance teacher, Oberon High School11, Oberon
-
Jane Wallace, Refugee Student Support, Multicultural Programs132, Sydney
Educators are encouraged to write their own Collaboratus resource and share with colleagues.
For more information see the Collaboratus: resource model128 and look for the Collaboratus template in Google Sites (staff only).
Links
- https://commons.wikimedia.org/wiki/File:2013-02-16_-_Wien_-_Demo_Gleiche_Rechte_f%C3%BCr_alle_(Refugee-Solidarit%C3%A4tsdemo)_-_Refugees_are_human_beings.jpg
- http://creativecommons.org/licenses/by-sa/3.0
- https://docs.google.com/forms/d/e/1FAIpQLSeQ3JycW2Ikzlt_c2sSXwwBrYERjMJa4U4zuUW68pcKBnAkxA/viewform?fbzx=-3379775898554520600
- https://commons.wikimedia.org/wiki/File:African_asylum_seekers_in_Israel_3.jpg
- http://creativecommons.org/licenses/by-sa/4.0
- https://www.youtube.com/watch?v=aem3JahbXfk
- http://mediasmarts.ca/game/jo-cool-or-jo-fool/kids
- https://www.flickr.com/photos/dfid/13152369903
- https://creativecommons.org/licenses/by-sa/2.0/
- http://www.roads-to-refuge.com.au/
- http://www.oberon-h.schools.nsw.edu.au/
- https://commons.wikimedia.org/wiki/File:Filming_Documentary_about_Sinenjongo_High_School_in_Joe_Slovo_Park,_Cape_Town,_South_Africa_-_05.jpg
- https://www.google.com/maps/d/viewer?mid=1OWoDVnDRFMJvR59W2XsosjIqPjI&ll=-33.874496408739695%2C151.20887704999996&z=17
- https://www.flickr.com/photos/evarinaldiphotography/6934330330/in/photolist-bMEVkg-byLfPu-bMEV8v-byLfhN-9eMtT7-byLfzL-9eJvKH-9eJmeV-9eJmGa-9eMGqh-9eMeNE-9eJv52-9eMHud-9eMBkU-9eJAuc-9eJu7r-9eJvkV-9eJnPk-9eJ8Qi-9eJA7Z-9eMsW7-9eMtyh-9eMeqL-9eMGPQ-9eJumR-9eJuzT
- http://www.abc.net.au/news/2015-04-01/bankstown-kids-say-no-to-domestic-violence/6360928
- http://www.musicoutback.com.au/
- http://unleashedfestival.com.au/
- https://brianbilston.com/2016/03/23/refugees/
- https://blog.wikimedia.org/2015/12/24/refugee-phrasebook/
- https://creativecommons.org/publicdomain/zero/1.0/
- https://app.education.nsw.gov.au/learning-tools-selector/Search
- http://image4free.com/downloads/question-mark-business-infographics/
- https://www.youtube.com/watch?v=oJxkLpN4I1I
- https://venngage.com/
- https://venngage.com/blog/how-to-make-an-infographic/
- http://www.wikihow.com/Make-a-Blanket
- https://www.youtube.com/watch?v=UlwAAoIzodU
- https://www.collectionscanada.gc.ca/stories/020020-4009-e.html
- http://wonderopolis.org/wonder/how-do-quilts-tell-stories
- http://www.instructables.com/id/How-to-sew-a-quilt-Quilting-101/?ALLSTEPS
- http://www.marlamallett.com/mounting.htm
- https://commons.wikimedia.org/wiki/File:Harriet_Powers_-_Pictorial_quilt_-_Google_Art_Project.jpg
- https://www.flickr.com/photos/movieingmemories/6244830775/in/photolist-avQoC8-avT4B1-avQoJp-avT4rf-avQoGZ-avT4Cj-avQoRx-avT4Lh-avQoM4-avT4Q1-bmBJZr-bmBJNc-bmBJEn-bmBJkv-bmBHgt-avT4i9-avQoqa-avT4k3-avT4yd-avT4mQ-avQozr-avT4sq-avQox4-avT4vJ-avQorP-avT4Mu-avT4Ry-bmBJJt-bmBGFF-bmBHJp-bmBKcp-bmBK7v-bmBuGD-bmBJRR-bmBJVR-avT4FW-avQoE6-avQovB
- https://creativecommons.org/licenses/by/2.0/
- http://generator.acmi.net.au/resources
- https://open.abc.net.au/learn?tutorialType=3&sortBy=publishedDate
- http://splash.abc.net.au/home#!/media/1771547/setting-up-equipment-for-a-video-interview
- http://splash.abc.net.au/home#!/media/1771577/choosing-the-location-for-a-video-interview
- http://edtechteacher.org/tools/multimedia/video-classroom/
- http://image4free.com/downloads/tablet-smartphone-google-maps/
- https://support.google.com/mymaps/answer/3024454?hl=en
- http://www.makeuseof.com/tag/get-creative-and-make-your-own-maps-with-custom-layers-on-the-new-google-maps/
- http://fieldguide.gizmodo.com/10-tricks-to-make-yourself-a-google-maps-master-1784947284
- https://www.cnet.com/au/how-to/google-maps-tips-and-tricks/
- http://startupstockphotos.com/post/91785522626/waterstreet-coffee-bar-one-of-our-all-time
- http://www.wikihow.com/Write-a-Rap-Song
- http://www.powerpoetry.org/resources
- http://www.wikihow.com/Start-a-Rap-Song
- http://blog.landr.com/use-samples-tracks-without-getting-sued/
- http://www.looperman.com/blog/detail/69/how-to-record-hip-hop-vocals-and-rapping-on-a-budget
- https://www.quora.com/How-can-I-record-good-quality-rapping-singing-with-no-studio-equipment
- https://support.office.com/en-us/article/Create-a-booklet-or-book-dfd94694-fa4f-4c71-a1c7-737c31539e4a
- http://www.howtogeek.com/howto/32759/how-to-create-booklets-in-word/
- https://www.printed.com/templates/folded-leaflet
- http://www.pw.org/content/diy_how_to_make_a_pocketsize_book_0
- https://commons.wikimedia.org/wiki/File:Grupo_de_estudiantes_expone_un_powerpoint_en_Escuela_Barreales,_Santa_Cruz,_Chile.jpg
- https://syllabus.bostes.nsw.edu.au/english/english-k10/content/902/
- https://www.literacyandnumeracy.gov.au/literacy-activities
- http://abcnews.go.com/International/deepdive/madaya-mom-mother-struggle-survival-syria-civil-war-42362213
- http://scan.nsw.edu.au/
- https://syllabus.bostes.nsw.edu.au/hsie/geography-k10/outcomes/outcomes-detail/outcomes-content/1106/
- https://syllabus.bostes.nsw.edu.au/hsie/geography-k10/outcomes/outcomes-detail/outcomes-content/1108/
- https://syllabus.bostes.nsw.edu.au/hsie/geography-k10/outcomes/outcomes-detail/outcomes-content/1111/
- https://syllabus.bostes.nsw.edu.au/hsie/geography-k10/outcomes/outcomes-detail/outcomes-content/1124/
- https://syllabus.bostes.nsw.edu.au/hsie/geography-k10/outcomes/outcomes-detail/outcomes-content/1123/
- http://visual.ly/philips-livable-cities
- http://unhcr.org.au/unhcr/images/Global%20Trends%202013.pdf
- http://www.gapminder.org/
- http://www.statsilk.com/maps/life-expectancy-interactive-world-map
- http://www.economist.com/blogs/graphicdetail/2015/08/daily-chart-5
- http://www.worldbank.org/en/country
- http://www.huffingtonpost.com/elizabeth-dickinson/fleeing-syria-now-support-ran-out_b_8352146.html?ir=Australia
- http://welcomeletters.weebly.com/sample-pages.html
- https://www.mca.com.au/telling-tales/telling-tales-safdar-ahmed/
- http://www.refugeeweek.org.au/
- http://www.art4refugees.org.au/art4refugees-junior/
- http://www.boardofstudies.nsw.edu.au/syllabus_sc/visual-arts.html
- http://www.refugeeweek.org.au/refugee-week-resources/resource-kit/
- http://www.aaa.org.hk/Home/Search?globalKeyword=refugee
- http://refugeeweek.org.uk/info-centre/educational-resources/classroom-resources/
- http://theconversation.com/beyond-community-art-finding-an-audience-for-refugee-artists-28907
- http://www.casulapowerhouse.com/whats-on/exhibitions2/refugee
- http://syllabus.bostes.nsw.edu.au/english/english-k10/learning-across-the-curriculum/
- http://syllabus.bostes.nsw.edu.au/hsie/geography-k10/learning-across-the-curriculum/
- http://www.digitalcitizenship.nsw.edu.au/
- http://creativecommons.org.au/
- http://lrrpublic.cli.det.nsw.edu.au/lrrSecure/Sites/LRRView/8587/
- http://guides.education.nsw.gov.au/libraries/home
- https://education.nsw.gov.au/policy-library/policies/controversial-issues-in-schools
- http://www.theguardian.com/global-development/ng-interactive/2014/jan/refugee-choices-interactive
- http://www.therefugeeproject.org/
- http://www.sbs.com.au/programs/go-back-to-where-you-came-from/mapping-the-worlds-refugees
- http://www.cbc.ca/news2/background/refugeecamp/refugees/refugee.html
- http://www.unhcr.org/
- http://voices.nationalgeographic.com/2009/06/18/angelina_jolie_world_refugee_day/
- http://www.racismnoway.com.au/
- http://www.refugeecouncil.org.au/
- http://www.unhcr.org/pages/49e48e571e.html
- http://www.unhcr.org/55c5bca86.html
- http://www.bbc.com/news/uk-29074736
- http://www.dw.com/en/germany-and-france-volunteer-to-take-mediterranean-refugees/a-18574400
- http://www.washingtontimes.com/news/2014/dec/10/calais-tests-french-attitudes-on-immigration/?page=all
- http://www.w2eu.info/france.en/articles/france-calais.en.html
- http://www.abc.net.au/compass/s2198467.htm
- http://keyofsea.com.au/stories/
- http://sounds.bl.uk/world-and-traditional-music
- http://www.worldmusic.net/guide/world-map/
- http://throughmyeyesbooks.com.au/index.html
- https://genius.com/Warsan-shire-home-annotated
- http://www.castfromthestorm.com/about-the-film/
- https://education.nsw.gov.au/policy-library/policies/anti-racism-policy?refid=285843
- https://education.nsw.gov.au/curriculum/multicultural-education/anti-racism-education
- https://education.nsw.gov.au/curriculum/multicultural-education/culture-and-diversity/cultural-inclusion#Culturally1
- http://www.australiancurriculum.edu.au/generalcapabilities/intercultural-understanding/introduction/introduction
- http://serc.carleton.edu/sp/library/cooperative/whatis.html
- https://www.theguardian.com/global-development/2015/jul/09/syria-refugees-4-million-people-flee-crisis-deepens
- http://www.amnesty.org.au/refugees/?&gclid=CIjH1ZKIsMwCFQqBvQodIHAFbQ
- http://www.politifact.com/truth-o-meter/statements/2016/jan/14/donald-trump/donald-trumps-false-claim-refugees-migrants-are-mo/
- http://www.refugeecouncil.org.au/getfacts/mythbusters/queue-jumpers/
- https://education.nsw.gov.au/policy-library/policies/controversial-issues-in-schools?refid=285776
- http://www.scootle.edu.au/ec/viewing/S6383/index.html
- http://www.scootle.edu.au/ec/viewing/L8470/index.html
- http://www.readwritethink.org/classroom-resources/lesson-plans/hoax-hoax-strategies-online-1135.html?tab=3#tabs
- http://scu.edu.au/teachinglearning/index.php/5
- https://www.ivcc.edu/stylebooks/stylebook6.aspx?id=14724
- http://www.schrockguide.net/critical-evaluation.html
- https://designthinkingforeducators.com/about-toolkit/
- https://schoolsequella.det.nsw.edu.au/file/23d078e5-d165-4942-8d28-4bc45759869b/1/Collaboratus-guide.zip/index.htm
- https://www.sri.com/work/projects/21st-century-learning-design-21cld
- https://spark.adobe.com/page/QAdgM/
- http://www.assessmentforlearning.edu.au/professional_learning/modules/peer_feedback/peer_strategies_enhance.html
- https://education.nsw.gov.au/curriculum/multicultural-education/refugee-students-in-schools