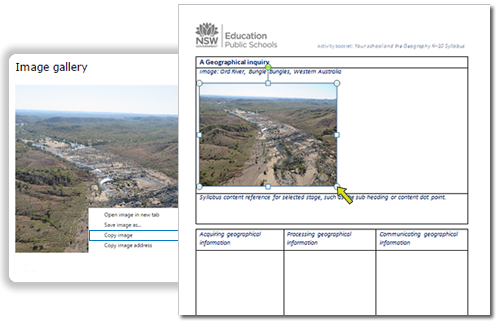
Copying an image from the gallery
To copy the image from the gallery to your Activity booklet:
-
Stop the automatic slideshow on the image you want to copy by clicking the ‘stop’ button. Note: you can manually move through the slideshow by selecting the next and previous arrows. Click the current image to go to the next image.
-
Right click on the image to display the contextual menu. On a Mac, press and hold the Control (Ctrl) key while you click on the image.
-
From the contextual menu, select ‘Copy image’ or ‘Copy’. The wording may be different in the browser you use.
-
Open your Activity booklet if it is not already open.
-
Go to the table on the second page of the ‘Course deliverable’ section of the booklet.
-
Click in the paragraph under the word ‘Image:’ and paste your image. To do this, you could use the contextual menu, keyboard shortcut or Edit menu.
-
Resize the image so that the following three-column table fits onto the bottom of the page. To resize the image, click on the image and drag the selection handle in the bottom right corner of the image towards the one at the top right corner.
-
Describe your photograph by adding a caption next to the word ‘Image:’ as shown in the example below.
