Introduction
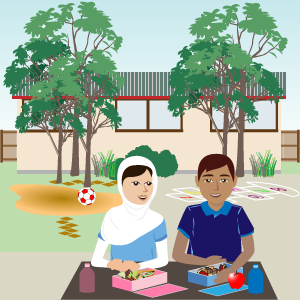
Ravi and Miriam looked in their lunch boxes and decided what to eat first.
"I'll have a falafel," decided Miriam.
Ravi looked at his apple. "I wish I had grapes," he said. "I wonder why I can't have grapes in my lunchbox every day?"
While Ravi ate his apple, Miriam was thinking about his question. "You know what," she said, "after lunch let's ask Mr Graham. It's a good question and I want to know the answer too!"
In this project we will be helping Ravi and Miriam to learn about plants and then plan and make a class garden in their school. Your class might also be planning and making a class garden or perhaps a similar project.
Getting organised

That afternoon, after quiet reading, Ravi and Miriam asked Mr Graham, "Why can't we have grapes in our lunchbox every day?"
Mr Graham looked pleased. "What a great question," he cried. "It has a complicated answer and I don't want to just tell you. So let's work together to answer it."
Mr Graham called the whole class together and asked Ravi to ask everyone his question. He then split the class into teams to think about what they though the answer was.
-
Organise the class into teams (your teacher may assign the teams).
-
Create an online learning journal or shared work space for the project.
-
Establish team roles and discuss rules for good teamwork (you may wish to use this Team roles template to get started).
-
Make a list of some questions you have about plants and how they grow.
How do the seasons influence what we plant?
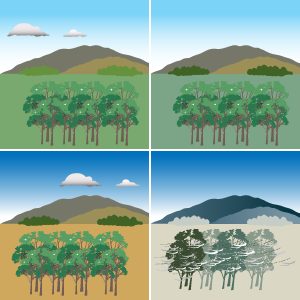
Once the teams had some time to think, they came back together as a class.
Each team shared some more questions they had come up with. Mr Graham made a big list of their questions about plants, how they grow and what they need.
Ravi looked at the list and suggested, "Let's start with seasons. Because they are long and have big changes."
"Okay," said Miriam. "I know what the seasons are. Do you?"
-
Watch the Seasons with Dirtgirl! video.
-
As a team, discuss what you have learned about the 4 seasons, recording the information in your journal.
-
As a team, share your new knowledge with the whole class.
"Wow!" Miriam marvelled to herself at the end of the school day. "I thought I knew about the seasons, but now I know a lot more."
At dinner that night, Miriam told her family all about Ravi's question and the things she had learned that day. Her brother asked, "What's the biggest change from one season to the next?"
Miriam was not sure, so she decided to find out.
-
Use the Meat and Livestock Australia’s Climate history webpage to research rainfall and temperature for your part of NSW.
-
Make a copy of the chart and keep it in your journal.
-
As a team, discuss the differences in rainfall and temperature between the seasons, recording the information in your journal.
-
Compare your part of NSW with a distant town and discuss the differences with the class.
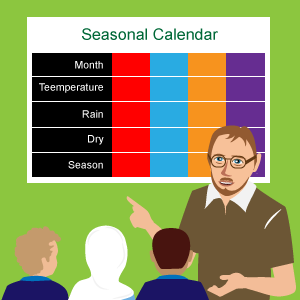
"Rainfall and temperature really change a lot between winter and summer, don't they?" asked Mr Graham, when the class was gathered back together. "Do we have enough information to answer your question yet Ravi?"
"Well I guess," he said. "But I don't really know the answer for sure. I still need to know HOW grapes grow, and WHEN they grow!"
"Let's start with when," suggested Miriam.
-
Make a seasonal calendar showing everything that you have learned so far. Include information on the seasons, temperature, rainfall and the types of fruits and vegetables that you could plant.
Tools to help you make a seasonal calendar. -
Share the information with the people in your team and save a copy to your journal.
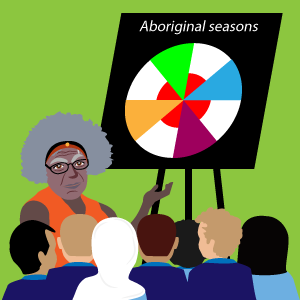
"We have a special guest today," announced Mr Graham. "Aunty Phillis is one of our local elders and she has come to talk to us about plants and seasons."
Aunty Phillis explained that the people from the First Nations of Australia have looked after this land for thousands of years and we can always learn from them.
"I have so many questions," whispered Miriam. "This will be exciting!"
-
Create an artwork showing your understanding of Indigenous seasons. It could be a calendar, picture or some other form of artwork.
-
Explain your calendar to your team.
What do plants need?
Ravi looked at the orange in his lunchbox and sighed. "I do like oranges," he said to Miriam, as he peeled the skin off. "But I really love grapes. Mum said I couldn’t buy grapes because they are too expensive at the moment and we have to wait till grape season, when they are cheaper."
"Maybe we could grow some," said Miriam. "We would need to give them the right amount of water and keep them warm."
"What else would they need?" wondered Ravi.
"Let's ask Mrs Chan," suggested Miriam.
At lunch time, Ravi and Miriam found Mrs Chan weeding the front flower bed. "What would we need to grow grapes at school?" asked Ravi politely.
"Plants need many different things," said Mrs Chan. "Maybe I should visit your class and tell you all about it?"
-
Watch Knowsy Nina’s How do plants grow? video.
-
As a team, record in your journal any new questions you have about what plants need.
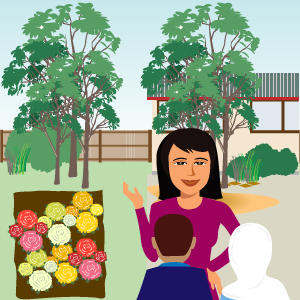
Mrs Chan's visit was great! Ravi and Miriam learned lots and during the lesson had come up with a wonderful idea. "Can we please have a class garden?" they begged Mr Graham.
"Hmmm, we'd have to ask Principal Snoke," he said slowly, "and we'd have to see if Mrs Chan has time to help us! Let me see what I can do."
The next week, Mrs Chan came to visit again. This time she had a big map of the school for everyone to look at.
"If we are going to grow some plants..." she said.
"Like grapes!" interrupted Ravi, before apologising.
"Perhaps," smiled Mrs Chan, "but as I was saying. If we are going to grow plants, even grapes, we need to do some tests before we can choose the right place. Let's start with the soil."
-
Watch SciShow Kids’ What’s the dirt on… dirt? video.
-
In your journal, make a list of things that you will need to test your soil for.
-
Save a copy of the Soil testing table in your journal.
-
Choose possible locations in the school for each team to investigate.
"What do we need to know about the soil?" asked Miriam.
"Isn't all soil the same?" added Ravi.
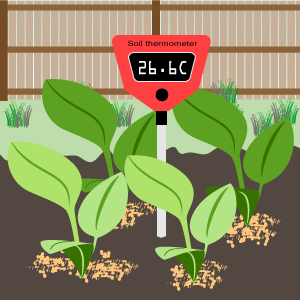
"Oh," laughed Mrs Chan, "soils are very different in different places and there are lots of things to consider before we decide where to plant. Let's start with the temperature."
-
Read the information in Tools to help you test soil before you begin.
-
As a team, go to your assigned part of the school and take temperature readings of the soil.
-
Remember to wear gloves when handling soil.
-
Record your data on your soil testing table.
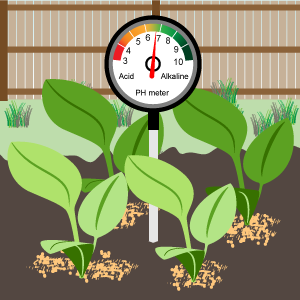
The class gathered together to look at the results.
"We can't grow there," said Ravi, pointing at the school map.
"Or there," added Miriam.
"Yes," agreed Mrs Chan, "our data says that those places are not good for growing plants."
"What's next?" asked the students, who were enjoying going outside to do the tests.
"pH," said Mrs Chan.
Ravi and Miriam looked at each other blankly. "What's that?" they wondered.
-
Read the information in Tools to help you test soil before you begin.
-
As a team, go to your assigned part of the school and take pH readings of the soil. Use the pH quality chart when testing your soil.
-
Remember to wear gloves when handling soil.
-
Record your data on your soil testing table.
Based on the pH tests, the class eliminated some more locations on the school map. "We are narrowing this down," said Miriam.
"Sure," said Ravi. "But what if we can't find anywhere to grow plants? That would be sad."
"Let's wait till we've finished testing," reassured Mrs Chan.
"Don't get ahead of yourselves," added Mr Graham.
"We need to look at soil type next," declared Mrs Chan.
-
Watch the Make Me Genius’ Types of soil video.
-
Read the information in Tools to help you test soil before you begin.
-
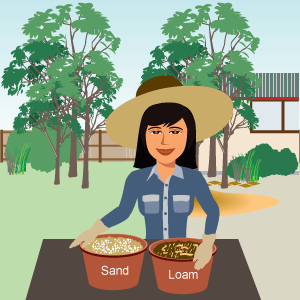
As a team, collect a soil sample from your assigned part of the school and try to identify the type.
-
Remember to wear gloves when handling soil.
-
Record your data on your soil testing table.
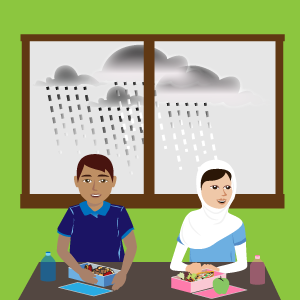
The next day it was raining and the students had to eat inside. There would be no chance to run and play.
"Silly rain," grumbled Ravi, who had been looking forward to playing soccer.
"What about our garden?" asked Miriam. "If we didn't have rain sometimes, we couldn't grow plants. All the grass would die and you would have to play soccer on the dirt."
"Oh," said Ravi thoughtfully, "well I wish it would only rain at school on the weekend then!"
"You're so silly," laughed Miriam. Ravi smiled too.
Mr Graham walked by. "I'm glad you are making the best of things," he said. "Since we have to stay inside, would you like to think about our garden some more?"
"Sure," said Ravi, "we need to think about water."
-
As a team, collect a soil sample from your assigned part of the school in a jar or small bucket (each team should collect the same amount of soil).
-
Remember to wear gloves when handling soil.
-
As a class, add a small amount of water to each soil sample and observe what the water does, paying attention to whether or not the water stays on top or disappears quickly.
-
Record your observations in your journal.
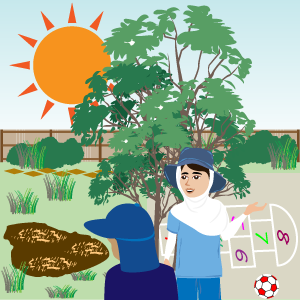
Next week the sun came out and the day got very hot. Ravi and Miriam were grateful for their hats and they ate lunch together in the shade of a big tree.
Miriam looked down at the ground. Right near the base of the tree there was very little grass. "Do you remember what Mrs Chan said about the things plants need to grow?" she asked.
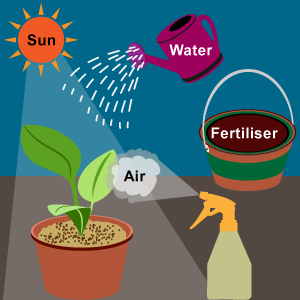
"Sure," replied Ravi, "soil, water, sunlight and air."
"Yes," said Miriam. "When we choose where to plant our garden, we'll need to think about shade won't we?"
"We may need to cross some more sites off our map," agreed Ravi.
-
As a team, go to your assigned part of the school and make a record of the sunlight and shadow in the space.
-
Use photos, videos, sketches or notes to record your findings.
-
Record all of your data in your journal.
-
Repeat the experiment at the start, middle and end of the day for 2 days.
What can we grow?
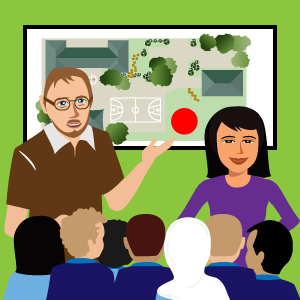
Mrs Chan, Mr Graham and the children looked at the school map on the board. One patch of land was circled in bright red.
"Hooray!" said Mrs Chan. "I'm very excited children. I think this will be a great place for our class garden."
"What's next children?" asked Mr Graham. "What do we do now?"
"Grow grapes," said Ravi with satisfaction.
"Can we?" asked Miriam. "What soil type do grapes need?"
"It sounds like we need to know more about what will grow in our school's conditions," said Mr Graham. "Time for some more research!"
-
As a team, present what you have learned about your space to the rest of the class. Remember to discuss the soil, water and sunlight conditions in that part of the school.
-
As a class, vote on the best location for the class garden.
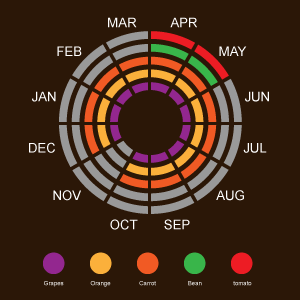
The next time the class got together to work on their project, Ravi was sad. "No grapes," he said to Miriam.
"They are hard to grow and only grow in certain places around the world. Plus it is the wrong time of the year," sympathised Miriam. "Even if we did plant grape seeds now, they wouldn't sprout. We'll just have to choose plants that grow well right now. How do we find that out?"
-
Use planting guide websites to research the types of fruits and vegetables that would grow well in your class garden.
-
Record your findings in your journal.
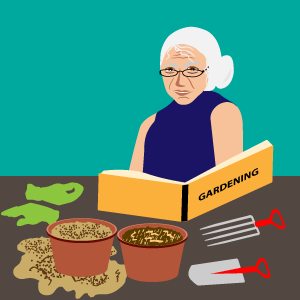
"I have a surprise," said Mr Graham. "Mrs Mueller from our local nursery has come to talk to us about the plants she grows for sale, and to give us some tips and tricks before we start planting. What questions should we ask her?"
-
Talk to a local gardening expert (or visit a gardening expert website).
-
Ask any questions that you still have about what to plant in your class garden, the best time to plant and how to look after your plants.
-
Record your questions, answers and any new information in your journal.
Planting a garden
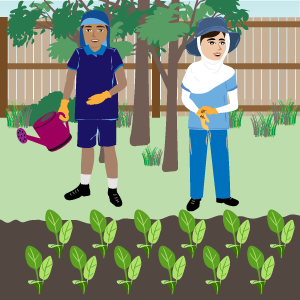
Ravi and Miriam looked down at the neat rows of dark soil. Miriam brushed the dirt off her gloves. "What a wonderful garden," she said.
"I know," said Ravi. "I'm so pleased that we got to answer my question."
"What about the grapes though?" asked Miriam. "Are you still sad about them?"
"A little," laughed Ravi. "But Mum says that they are coming into season soon, so she will buy some for me. And I found out something even better!"
"Better than grapes!" cried Miriam. "I thought grapes were your favourite."
"They are my favourite fruit," said Ravi. "But my favourite vegetable is spinach." Miriam looked at the long row of planted seeds, all of them spinach, and smiled. "Mr Graham said that when they grew, we can make a pie and I can eat as much as I want! I'm so excited!"
"I can't wait either," said Miriam, as they walked away to wash their hands.
-
As a class, you are now ready to plant your class garden (or other task that your class decided on as part of this project).
-
After you have finished, consider what you have learned during this project. Your teacher will lead you through an activity on reflecting on, recording and discussing you learning as a class.
Information for teachers
‘How does your garden grow?’ is a Stage 2 resource that grew from a conversation between young students questioning why they could still buy grapes if they were out of season. This wondering led to a discussion around when we grow certain fruit and vegetables. The original stimulus was extended to cover planting for the seasons and factors that influence healthy plant growth.
At the end of their learning, students will have the understanding that the seasons, as well as a number of other factors (sunlight and soil temperature, pH level and type), influence what, when and where we plant our fruit and vegetables.
Extension activities
This learning could be extended with information about how humans can manipulate the environments that plants grow in, such as the use of hothouses to mimic warmer seasons and adding fertilisers, food and other matter to soil to create ideal conditions.
Literacy and numeracy
This project incorporates multiple opportunities for students to engage with literacy and numeracy learning activities which may support their preparation for NAPLAN.
This resource supports student-centred, project-based collaborative learning. Tools such as Google G Suite, Microsoft Office 365 and other digital tools can assist with allowing students to effectively collaborate within their teams, store their work and share their final product with their teacher and fellow students.
Science and technology
This resource supports students in the Science and Technology K-6 NEW syllabus.
The project in this resource requires students to use all aspects of the design and production skills continuum for Stage 2.
The activites included in this resource support students to develop thinking skills including Design thinking, Scientific thinking and Systems thinking.
A student:
-
questions, plans and conducts scientific investigations, collects and summarises data and communicates using scientific representations ST2-1WS-S
-
selects and uses materials, tools and equipment to develop solutions for a need or opportunity ST2-2DP-T
-
compares features and characteristics of living and non-living things ST2-4LW-S
-
describes how agricultural processes are used to grow plants and raise animals for food, clothing and shelter ST2-5LW-T
-
investigates the suitability of natural and processed materials for a range of purposes ST2-7MW-T
-
investigates regular changes caused by interactions between the Earth and the Sun, and changes to the Earth’s surface ST2-10ES-S
Geography
This resource supports students in the Geography K-10 syllabus.
A student:
-
examines features and characteristics of places and environments GE2-1
-
examines differing perceptions about the management of places and environments GE2-3.
Mathematics
This resource supports students in the Mathematics K-10 syllabus.
A student:
-
uses appropriate terminology to describe, and symbols to represent, mathematical ideas MA2-1WM
-
selects and uses appropriate mental or written strategies, or technology, to solve problems MA2-2WM
-
checks the accuracy of a statement and explains the reasoning used MA2-3WM
-
selects appropriate methods to collect data, and constructs, compares, interprets and evaluates data displays, including tables, picture graphs and column graphs MA2-18SP.
Personal development, health and physical education
This resource supports students in the Personal Development, Health and Physical Education K-6 syllabus.
A student:
-
increasingly accepts responsibility for personal and community health V4
-
discusses the factors influencing personal health choices PHS2.12.
Creative arts
This resource supports students in the Creative Arts K-6 syllabus.
A student:
-
Represents the qualities of experiences and things that are interesting or beautiful by choosing among aspects of subject matter VAS2.1.
This resource provides explicit opportunities for students to engage with the Science K-10 (incorporating Science and Technology K-6) syllabus’ Learning across the curriculum content.
Cross-curriculum priorities
-
Aboriginal and Torres Strait Islander histories and cultures
-
Sustainability
General capabilities
-
Critical and creative thinking
-
Information and communication capability
-
Intercultural understanding
-
Literacy
-
Numeracy
-
Personal and social capability
-
Work and enterprise
Books (available from Trove – National Library of Australia)
-
The vegetable garden by Melvin Berger
-
How does your garden grow? by David Keystone and Carole Coburn
-
Isabella’s garden by Glenda Millard and Rebecca Cool
-
Experiment with a plant’s living environment by Nadia Higgins
-
Ernie dances to the didgeridoo by Alison Lester
-
Walking with the Seasons in Kakadu by Diane Lucas and Ken Searle
-
A year on our farm by Penny Matthews and Andrew McLean
-
Seasons in Australia by Greg Pyers (4 volumes)
-
Temperature by Alan Rodgers and Angella Streluk
-
Dirt: the scoop on soil by Natalie M Rosinky and Sheree Boyd
-
Grow it, eat it: simple gardening projects and delicious recipes by Royal Horticultural Society (Great Britain)
Videos
-
SciShow Kids – Be a weather watcher (learn about different types of weather and how to keep track of your weather observations)
-
SciShow Kids – Make the most of compost (learn about how you can turn certain types of trash into nutrient packed soil you can use in the garden)
-
SciShow Kids – Where does water come from? (learn about the water cycle)
-
Splash ABC – Indigenous seasons across northern Australia (learn about indigenous seasonal calendars with links to meteorological patterns with changes in plant and animal life across the year)
Websites
-
Sydney markets – Fresh for kids (games, competitions and information about fresh and healthy food – some Flash-based content)
-
Top marks – All about spring (slideshow about spring and its effect on plants)
-
TVOKids – Get growing game (preschool game that teaches about planting and growing vegetable gardens)
-
Yates – Garden greenies (games, projects, information and school resources to support student learning about gardening)
21st century learning design (21CLD)
This project is designed to target 21st century learning skills.
Students will work collaboratively as they:
-
identify what they already know and want to know about seasons and growing plants
-
observe, record and describe conditions for growing plants in their space and make joint decisions based on the information gained
-
negotiate necessary roles and who will fill them throughout the project
-
draw on the expertise of external specialists and use it to make joint decisions.
Students will construct knowledge as they:
-
investigate different factors for growing healthy plants
-
use their knowledge of the seasons, what plants need and about different plants to decide what to grow in their space.
Students will solve real-world problems and innovate as they:
-
investigate how the seasons affect planting decisions
-
identify the best place to start a garden and which plants to grow in their space or complete their chosen task (as negotiated in class).
For more information about 2st century learning design, visit Microsoft’s Innovative Teaching and Learning Research project website.
These notes provide additional information to support teachers as they guide students through each section of this resource.
The overview aims to broadly outline the nature of the learning, engage student interest in the project and activate any prior knowledge. The class will also have an opportunity to discuss, and perhaps decide, the product that will be delivered at the end of the project.
Ideally the class will work through the project and deliver a small fruit and/or vegetable garden. The students will investigate various possible sites within the school to determine the best location, and then plan and implement the finished product. If this is not feasible within your school an alternative deliverable could be chosen. See Put it into practice (below) for some alternative ideas.
This resource could be taught over several weeks. It is recommended that learners work in the same small teams throughout the project. Allocate each team a specific space within your school grounds to base their investigations on.
Revise talking and listening skills if necessary, explaining that collaboration requires everyone to participate as equally as possible. Develop class guidelines around collaborative work that learners can add to or amend as they work on their project.
During the project students will take turns using equipment. It may help to develop class guidelines around how to use this equipment safely.
Consider how you will organise the class in deciding what their final project will be (such as deciding which team’s garden design will be worked on). Students may make a decision firstly in their teams and then a representative of each team could present the reasons for their choice to the class. The class could then vote on their favourite proposal.
Many tools exist to help students to collaborate and safely store and share digital copies of their work. These could include:
-
Google Classroom
-
Google G Suite (including Drive)
-
Microsoft OneNote Class Notebook
-
Microsoft Office 365 (including OneDrive).
Throughout the project, the students are required to keep a learning journal. You may wish this to be completed individually or in their teams. It is important that you choose an appropriate, online tool for this purpose; to allow students to work collaboratively and to allow them to share their journal with you, for ongoing support and assessment.
Encourage your students to upload any materials that they produce as part of the process to the chosen collaborative tool. These could include:
-
equipment use guidelines
-
team work guidelines
-
planting information
-
seasonal calendars
-
soil testing data
-
water and sunlight data.
For more information about software tools for a wide variety of tasks, visit the NSW Department of Education’s Learning tools selector.
Students will take on different roles as they work through this resource. It is important to consider and discuss how will these be organised? Roles could include:
-
monitoring time limits and ensuring work is completed
-
using and maintaining equipment
-
recording data and ideas
-
sharing and presenting ideas about what the data shows.
To help organise the team roles in your class, consider using the Team roles template. When students click the link to the template, they will be prompted to ‘Make a copy’; a copy of the file will be saved to their Google Drive. For help in completing the template review the Team roles example.
To further support your students, you may wish to download the files and then share them to your class using Google Drive or Google Classroom.
This section explores what students already know about the seasons and builds upon or consolidates knowledge through guided research. Students will brainstorm to share their knowledge and current understandings. They also have an opportunity to ask questions about the seasons, especially in relation to growing plants.
This section of the project might be introduced to the class by watching the Seasons with Dirtgirl! video. Additional support materials may be found on the Seasons in Australia webpage and Seasonal food guide’s Sydney and New South Wales seasonal produce webpage.
Using the Meat and Livestock Australia’s Climate history webpage, students can produce a simple chart showing rainfall and temperature in their location. Comparing this data with data for another location could provide the understanding that climate can vary in different locations.
Students represent their knowledge about the seasons in their location by creating a seasonal calendar. They may add plant, human or animal activities to the calendar to show the differences between the seasons. Remind the students to save or upload their finished work to their journals.
Prepare by reviewing the Tools to help you make a seasonal calendar.
You may wish to start this activity by reading Walking with the Seasons in Kakadu by Diane Lucas and Ken Searle as a class. Students gain an understanding of Indigenous seasonal calendars through exploring various texts and websites and by engaging in class discussion. Discussion points could include:
-
How are Aboriginal seasons different to other seasons?
-
How are they similar?
-
Why would Aboriginal peoples have different seasons?
-
Why do you think these calendars are round?
For additional information visit:
-
Bureau of Meteorology’s Indigenous weather knowledge website
-
Questacon’s Seasonal calendar webpage.
In this section students investigate different aspects of soil and learn how these qualities (temperature, pH and type) can affect plant growth. The water absorption of different kinds of soil is also examined. Finally, students will investigate how sunlight moves throughout a day and make observations about how this affects shade/shadows. Learners will use a variety of equipment to complete these investigations (see below). This section of the activity might be introduced to the class by watching the Knowsy Nina How do plants grow? video.
Provide students with scaffolded instructions for using the equipment and recording their data. Use the Soil testing table template to collate each team’s results. At the end of the investigation, students can collaboratively decide which space looks most suitable for planting.
Students investigate soil temperature, the amount of acid (pH level) in the soil and then classify the type of soil in their allocated space. They will also learn how these factors affect plant growth. This activity might be introduced to the class by watching the SciShow Kids What’s the dirt on… dirt? video.
Resources needed:
-
propagation thermometer
-
pH meter
-
soil samples (from the various sites being considered for the garden)
-
gloves for students touching soil
-
trowel or similar for digging soil.
Discuss the ‘pH quality chart’ (below), explaining that a pH level between 5 and 7.5 is most suitable for growing plants. Levels immediately either side of these figures may be suitable also. The ‘Tools to help you test soil’ (below) provide information to help students identify their soil type. Additional resources include:
-
Make me genius’ Types of soil video.
Students investigate how water drains through different kinds of soil. If time permits, you could combine the soil and water testing tasks into 1 activity.
Resources needed:
-
different kinds of soil (ideally these will come from the various sites being considered for the final garden. If necessary, create diverse types of soil by adding elements like sand or clay)
-
containers for soil, similar in size
-
containers for water
-
gloves for students touching soil
-
trowel or similar for digging soil.
After collecting soil samples from various parts of the school, add a small amount of water to each sample. The students should record their observations in their journals of what the water does and make predictions on how this may help them decide how much watering a plant in this soil may need.
The amount of sunlight in each space should be an important consideration when students choose the final location for their garden.
Choosing the same three times (for example, the start of the day, after recess and after lunch) over two days should give a range of useful data. Students can record their investigations with photos, videos, sketches or notes. Consider transferring the data to a large diagram or photograph of your school.
For a new perspective on their school’s layout and to help predict how sunlight and shadows change over a day, students could make use of Google Earth. Please note that Google Earth will only work in the Google Chrome browser.
At this point students should have collected data about the seasons, soil, water and sunlight. They have also explored various locations for their new garden and when they might plant it.
In this section students can use external, real-world sources (planting guides and gardening experts) to gain specialist knowledge about what they could grow in their chosen location(s).
The following planting guide websites are listed to help the class get started:
Consider asking a local expert to visit your school or consult with someone online. To make sure someone is available, try scheduling an appointment with Yates’ Garden expert webpage.
Use the data that the students have collected, and any other questions that they have identified, to guide this session. An example may be:
-
We have a full-sun space with a pH level of 10. The soil is loamy clay. The soil temperature is seven degrees:
-
what fruit or vegetable seeds would grow best?
-
what nutrients do you recommend for our soil?
-
do you have any other advice for us to make our garden successful?
-
At the end of this section students should have a list of possible plants to grow in their space.
The culminating task provides the opportunity for students to show their learning.
If planting a garden or growing plants is not possible, another task which could allow students to apply their learning could be used:
-
Producing a garden plan or mud map showing where plants go (see an Example mud map).
-
Creating a planting calendar (digital or analogue, circular or conventional). A digital calendar would enable this to be an ongoing task.
-
Planning a seasonal menu and publish it to the school website or newsletter.
-
Writing a proposal for funding (try your P&C, local council, environmental organisations, local Aboriginal Land Council, or similar) to plant a garden.
-
Collaborating with a school in another area to share and compare findings from their investigations.
The task could also be extended in various ways:
-
Selling garden produce to your school community or donating it to a charity.
-
Inviting feedback from a local restaurant on a seasonal menu design.
-
Holding a class fest with food provided from the new garden.
Reflecting on the learning content and process is a critical part of 21st century learning. Use the questions provided in the resource or devise your own reflection activity.
Follow your regular reflection routine or guide students in using a new tool to capture their content knowledge and their learning process. Examples of tools that could help include:
-
Bubbl.us
-
Google Drawings (an add-on for Google G Suite)
-
MindMup (an add-on for Google G Suite).
Bring students back to the original question and discuss – Aren’t grapes out of season? While gardeners can sidestep the seasons with strategies such as hothouses, the original question still provides students with an opportunity to engage in a rich and through-provoking exploration of modern-day agriculture.
As the teacher you also may like to reflect on how you might improve the future delivery of this project and what have you learned about embedding 21st century skills into a learning experience.
This resource has been developed by a collaborative team of writers to support the NSW Department of Education's Rural and remote education blueprint.
Collaborators
-
Ros Graham, Teacher Librarian, Riverstone PS
-
Heather Ale, Deputy Principal, Dalmeny PS
-
Sam Clifton, R/Assistant Principal Learning and Support, Moree East PS
-
Tanya Coli, Science and Technology Adviser K-6, Early Learning and Primary Education
Educators are encouraged to write their own Collaboratus resource and share them with colleagues.
For more information see the Collaboratus page on the NSW Department of Education website.