links open in new tab


Minecraft Education Edition - Companion Apps


* Please note this is an advanced user guide and assumes you have already installed Minecraft Education Edition on all users' devices

What are the companion apps available for Minecraft Education Edition?

There are currently two companion apps available - Classroom Mode and Code Connection.

Classroom Mode

Classroom Mode enables educators to facilitate a managed world in Minecraft Education Edition. Some of the features include:

  • Monitor all students location in world
  • View a list of all students in world
  • Manage world settings
  • Teleport students
  • Pause the game

This is a useful tool for managing an immersive or simulated experience. Find out more about Classroom Mode.

Installing Classroom Mode

The Classroom Mode companion app only needs to be installed on the teachers device. Students simply need to join the teacher's created world.

Note: To install Classroom Mode you will need to have Windows device admin privileges to complete the process.

To install Classroom Mode for Minecraft on Windows 10:

  1. Download the latest version of the application for Windows 10
  2. Run ClassroomModeSetup.msi when prompted
  3. Click Next and enter administrator details if prompted
  4. Click Finish when prompted.

The installer should place a Classroom Mode icon on your desktop. It will also appear in your Start Menu as “Classroom Mode” under a folder titled “Minecraft Education Edition”.

To install Classroom Mode for Minecraft on MacOS:

  1. Download the latest version of the application for MacOS
  2. Open Classroom_Mode.dmg from your Downloads folder
  3. Drag the "Classroom Mode for Minecraft" icon to your Applications folder when prompted

When installation is complete, the application appears as “Classroom Mode” in your Applications folder.

Running Classroom Mode: All devices

1. Launch Minecraft Education Edition and either join a world or if you wish to create a world for students to join, create a world. (NB to run classroom mode you will need to enable both 'Multiplayer' and 'Cheats'. This is completed by default when creating a new world, but if you encounter an error or require assistance, please see the 'World Settings' section in the Minecraft Tips document.

2. Launch Classroom Mode as a DoE user

3. You may now see games available on your network that you can apply Classroom Mode too (as per below), simply double click on the world you wish to apply classroom mode too. (This could include the world you have created).

4. If however you cannot see any worlds or the world you wish to connect too tou will need to follow the following instructions.

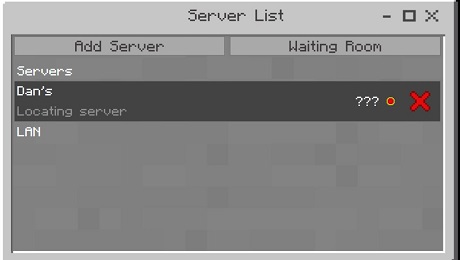
5. Click on the 'Waiting Room'

Minecraft Server List - Waiting Room

6. Click on the 'copy' button (as shown below) to copy the connect command

Classroom Mode connect command

7. Press Alt-Tab (Win) or Cmd-Tab (Mac) on your keyboard to switch back to Minecraft and press Enter to open the chat/command line.

Minecraft command line

8. Ctrl-V to paste the connect line you copied at step 3 then press Enter. You should receive a 'Connection Established' message or something similar in the top-left corner.

Connection established message

9. Use the Alt-Tab or Cmd-Tab keyboard toggle to switch between the Minecraft and Classroom Mode windows as required.

10. Now simply invite students to your world. Here is a user guide. Please note that currently, a multiplayer world only operates within your school's network.

11. Visit the Classroom Mode site to get information on the features and uses of this tool.

Code Connection

Code Connection enables students to use online code building platforms including Tynker and MakeCode to connect and build in Minecraft. Processes can be automated and computational thinking outcomes explored. Find out more about Code Connection.

Note: Code Connection no longer needs to be installed separately since the update released November 2018. To launch Code Connection in any version installed after this date, open a Minecraft world and press 'c' on your keyboard.

If you are still running an older version of MEE, it is strongly recommended that you update in order to access Code Connection.

Running Code Connection - All devices

1. Launch Minecraft Education Edition and enter a world

2. Launch Code Connection as a DoE user and click on the 'copy' button to copy the connect command.

Code Connection connect command

3. PressAlt-Tab (Win) or Cmd-Tab (Mac) on your keyboard to switch back to Minecraft and press Enter to open the chat/command line.

Minecraft command line

4.Ctrl-V to paste the connect line you copied at step 2 then press Enter. You should receive a 'Connection Established' message or something similar in the top-left corner.

Connection established message

5. Use the Alt-Tab or Cmd-Tab keyboard toggle to switch to 'Code Connection' and then click on the editor you wish to connect with (Note: Scratch X is currently the only editor that functions on the MacOS and conversly does not function smoothly on Windows 10 devices).

.Choose editor options

Use the Alt-Tab or Cmd-Tab keyboard toggle to switch between the Minecraft and Code Connection windows as required.

Now that you have installed Code Connection you can work within your desired editor to code and create in Minecraft Education Edition. Specific resources and tutorials on each editor can be found at the links below:

  • Tynker - Dedicated site with tutorials and challenges
  • MakeCode - Developing site with samples and activities
  • Scratch - Click on the "Code Connection feature Doc" for an introductory activity with Scratch X

T4L Tips: Sharing a world or creating a multi-player world

1. Before installing the Classroom Mode companion app, you should become familiar with the process for setting up a multi-player world. The prerequisite for Classroom Mode is that both students and the teacher are interacting in the one world. Here is a user guide on how to set up a mutiplayer world. Please note that currently, a multiplayer world only operates within your school's network.

2. When sharing a world, your students will need to give your server a name (this is not something you can locate). An example might be 'Mr Murray's World', or you could name it after the activity you are developing for your students. An easy to identify name will make rejoining for your students easy.

Stage Suggestions: Stages 2-6

Device Requirements: Windows 10 or Mac OS